Smoked Chicken Thighs: The Ultimate Comfort Food
Introduction
The first time I attempted smoked chicken thighs, it was nothing short of a culinary disaster. Picture this: It was my husband’s birthday weekend, and I’d promised “the best BBQ you’ve ever tasted.” What actually happened? The chicken came out looking like charcoal briquettes, the smoke detector performed an impromptu concert, and we ended up ordering pizza at midnight. Not my finest moment.
But here’s the beautiful thing about cooking – every failure teaches you something. After that night, I became obsessed with mastering smoked chicken thighs. Through twelve batches (and one small grill fire we don’t talk about), I’ve learned that the magic lies in the imperfections. That slightly too crispy edge? Adds character. The smoke ring that didn’t quite form? Doesn’t matter when the flavor’s there.
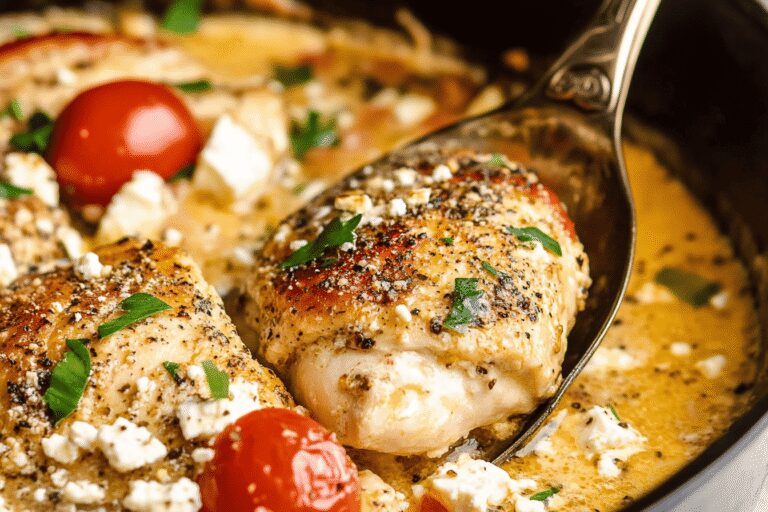
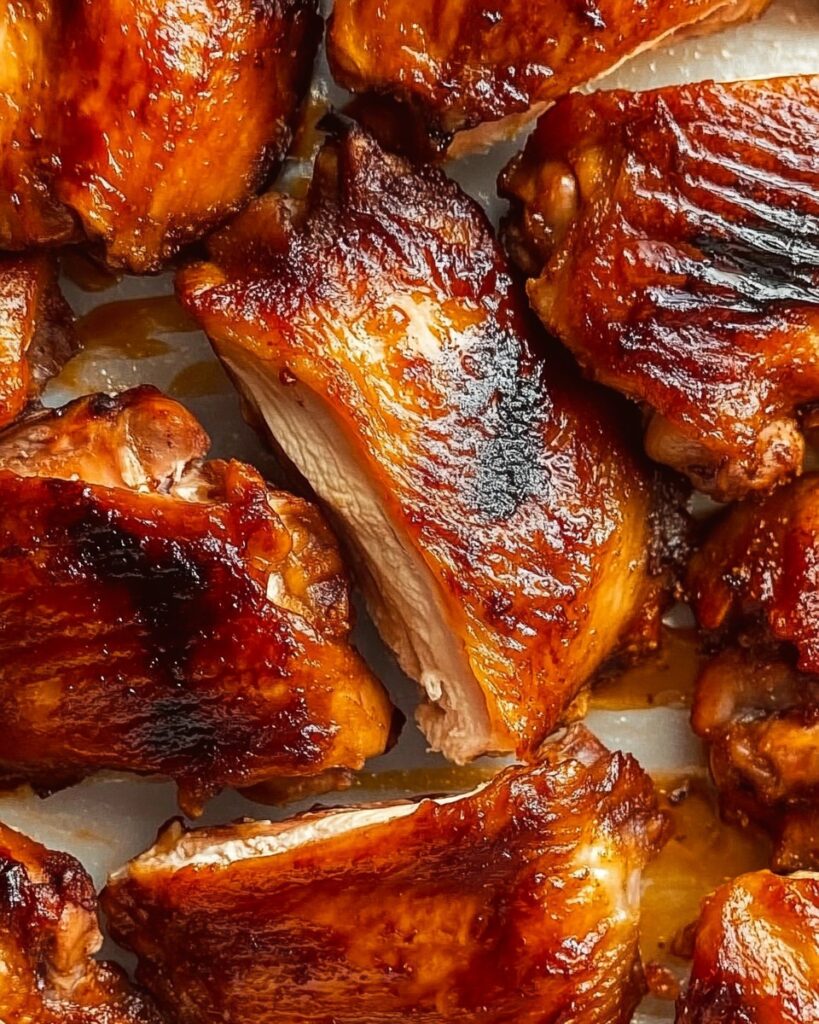
What makes these smoked chicken thighs special isn’t just their juicy interior and crispy skin (though that’s certainly part of it). It’s how they transform an ordinary Wednesday into something worth celebrating. The way the aroma fills your kitchen and wafts out to the street, making neighbors suddenly very interested in being your friend. How the leftovers make the best tacos, salads, or – let’s be real – midnight snacks straight from the fridge.
Why You’ll Love This Recipe
- Forgiving for beginners: Unlike temperamental cuts like brisket, chicken thighs are practically foolproof. Overcook them a bit? Still juicy. Undercook slightly? Easy to fix.
- Budget-friendly magic: Chicken thighs cost about half what breasts do, yet deliver twice the flavor. More delicious dinners, less guilt about that fancy olive oil you splurged on.
- Meal prep superstar: These reheat beautifully for up to 4 days, making them perfect for busy weeks. I always make extra for quick protein boosts.
- Customizable canvas: The basic recipe is just the starting point. Add heat with cayenne, sweetness with maple, or brightness with citrus zest.
- Comfort in every bite: There’s something primal and satisfying about smoky, juicy chicken. It’s the culinary equivalent of your favorite worn-in sweater.
Ingredients Breakdown (With Smart Swaps)
The Chicken
- 6 bone-in, skin-on chicken thighs (about 3 lbs): The bone keeps moisture in during long cooking, while the skin crisps up beautifully. For a leaner option, you can use skinless, but add 1 tbsp oil to the rub.
Pro tip: Look for plump thighs with even coloring. If you see any grayish spots, pass – that chicken’s seen better days.
The Rub
- 2 tbsp kosher salt: The coarse grains distribute better than table salt. If using table salt, cut to 1 tbsp.
- 1 tbsp freshly ground black pepper: None of that pre-ground dust. Freshly cracked makes all the difference.
- 2 tbsp smoked paprika: This is where the magic starts. Regular paprika works in a pinch, but you’ll miss that depth.
- 1 tbsp garlic powder: Not garlic salt! We’re controlling our salt separately.
- 1 tbsp onion powder: The subtle sweetness balances the smoke.
- 2 tsp brown sugar: Just enough to promote caramelization without making it dessert. Honey powder works too.
Fun story: I once used 2 tbsp sugar instead of tsp by accident. The result was… interesting. Let’s just say the chickens tasted like they’d been to candyland.
The Smoke
- 2 cups wood chips (hickory or applewood): Soaked for at least 30 minutes. No wood chips? Try 1/2 cup loose tea (Earl Grey works shockingly well) wrapped in foil with holes poked in.
Step-by-Step Instructions
1. Prep Work (Where Most People Rush)
- Dry the chicken thoroughly with paper towels. I mean REALLY dry. Any moisture will steam the skin instead of letting it crisp. This step alone improved my results by 50%.
- Mix the rub in a small bowl. Taste a pinch – it should be salty but not overwhelming. Adjust if needed. I keep a jar of this mixed up at all times now.
Confession: I’ve definitely licked my finger after rubbing the chicken and then panicked about raw chicken germs. Don’t be like me.
2. Applying the Rub (Get Hands-On)
- Drizzle thighs lightly with oil – just enough to help the rub adhere. About 1 tsp per thigh.
- Massage the rub into every nook – under the skin where possible, and don’t forget the sides. The more contact, the better the flavor.
Helpful hack: Use disposable gloves unless you want paprika-stained fingers for days. Ask me how I know.
3. Setting Up the Smoker (No Fancy Gear Needed)
- If using a charcoal grill: Bank coals to one side. Place a foil drip pan on the empty side. Add 1/2 cup soaked wood chips directly on coals.
- Target temperature: 225-250°F. The “low and slow” zone. Any hotter and the fat won’t render properly.
First-timer tip: Your temperature will fluctuate. That’s normal. Just try to keep it in the general vicinity.
4. The Smoking Process (Patience Required)
- Place thighs skin-side up on the cool side of the grill, not directly over heat. Close the lid with vents half-open.
- Resist opening the lid for at least 45 minutes. Every peek adds 15 minutes to your cook time. I set a timer to curb my curiosity.
- After 1 hour, check internal temp. You’re aiming for 165°F at the thickest part, not touching bone. They’ll likely need 1.5-2 hours total.
Dramatic moment: When the skin starts to pull back from the bones, revealing those gorgeous caramelized edges? Chef’s kiss.
5. The Crisp Factor (Optional but Recommended)
- For extra crispy skin, move thighs directly over the coals for 1-2 minutes per side at the end. Watch closely – they go from perfect to carbon quickly.
Cautionary tale: I once answered a text during this step and returned to blackened chicken. My smoke detector confirmed my failure.
6. The Most Important Step (Don’t Skip)
- Let rest 10 minutes before serving. This allows juices to redistribute. Cutting in early = dry chicken = sad faces.
Pro Tips & Next-Level Variations
Flavor Boosters
- Coffee rub: Add 1 tbsp finely ground coffee to the rub mix. The bitterness plays beautifully with the smoke.
- Asian-inspired: Swap the rub for 2 tbsp five-spice powder + 1 tbsp ginger powder. Brush with hoisin sauce last 10 minutes.
- Lemon pepper: Add zest from 2 lemons to the rub + extra black pepper. Squeeze lemon over after resting.
Cooking Methods
- Oven method: No smoker? Bake at 275°F for 2 hours on a rack, then broil 2 minutes to crisp.
- Pellet grill: Use fruitwood pellets at 225°F. No need to rotate.
- Slow cooker: Not ideal, but in a pinch: 4 hours on low, then crisp under broiler.
What to Serve With Your Masterpiece
The Classics
- Creamy potato salad with fresh dill
- Grilled corn with chili-lime butter
- Collard greens simmered with smoked turkey (for extra depth)
Unexpected Pairings
- Cold sesame noodles for a smoky/creamy contrast
- Watermelon-feta salad to cut through richness
- Kimchi fried rice using chopped leftovers
Storage & Reheating Like a Pro
Fridge Storage
- Let cool completely before refrigerating in airtight container.
- Separate skin from container sides to prevent sogginess.
- Best within 4 days, though I’ve pushed to 5 in a pinch.

Freezing
- Remove bones first to save space.
- Wrap individually in foil, then place in freezer bags.
- Thaw overnight in fridge before reheating.
Reheating Methods
- Oven method (best): 350°F on a rack for 10-15 minutes
- Air fryer: 375°F for 5 minutes – almost as good as fresh
- Skillet: Medium heat with 1 tsp oil to recrisp skin
Mistake to avoid: Microwaving straight from frozen. You’ll get rubbery disappointment.
Frequently Asked Questions
Q: Can I use boneless thighs?
A: You can, but they’ll cook faster (about 1 hour) and won’t be quite as juicy. Reduce salt in rub by 1/4 since more surface area is exposed.
Q: My skin is rubbery – help!
A: Two fixes: 1) Make sure chicken is VERY dry before seasoning 2) Finish at higher heat (400°F) for 5 minutes to crisp.
Q: Is pink near the bone safe?
A: Yes! As long as internal temp reached 165°F, the pink is just myoglobin reacting with smoke. Totally normal.
Q: Can I prep ahead?
A: Absolutely. Apply rub up to 24 hours in advance (store covered in fridge). The salt will actually help retain moisture.
Troubleshooting Table
| Issue | Likely Cause | Solution |
|---|---|---|
| Bitter taste | Creosote buildup from dirty smoker or green wood | Clean equipment, use properly seasoned wood |
| Uneven cooking | Heat source too close/uneven | Rotate thighs halfway, check for hot spots |
| Rub won’t stick | Chicken too wet or not enough oil | Pat drier, lightly oil skin first |
| Finished too early | Temperature spiked | Wrap in foil + towel in empty cooler to hold |
| Finished too late | Guests arrived early | Slice and serve with extra sauce to mask dryness |
Final Thoughts
These smoked chicken thighs have become more than just a recipe in our house. They’re the dish I make when friends need cheering up, when we’re celebrating small victories, or when I just need to lose myself in the rhythmic process of tending the fire. There’s something therapeutic about the slow transformation from raw ingredients to smoky perfection.
The beauty lies in how each batch tells its own story. That time it rained midway through and I had to finish them in the oven. The batch where I forgot the sugar but discovered I actually preferred it without. Even that first disastrous attempt makes me smile now – because it started this delicious journey.
So I’ll leave you with this: What kitchen failures have led to your favorite discoveries? And more importantly – when are you firing up your smoker next? Because once you taste that first perfect bite of smoky, juicy chicken, there’s no going back.
Recipe adapted through years of trial and (mostly) error. Special thanks to my patient husband for eating countless “experimental” batches, and to our long-suffering smoke detector for its persistent feedback.