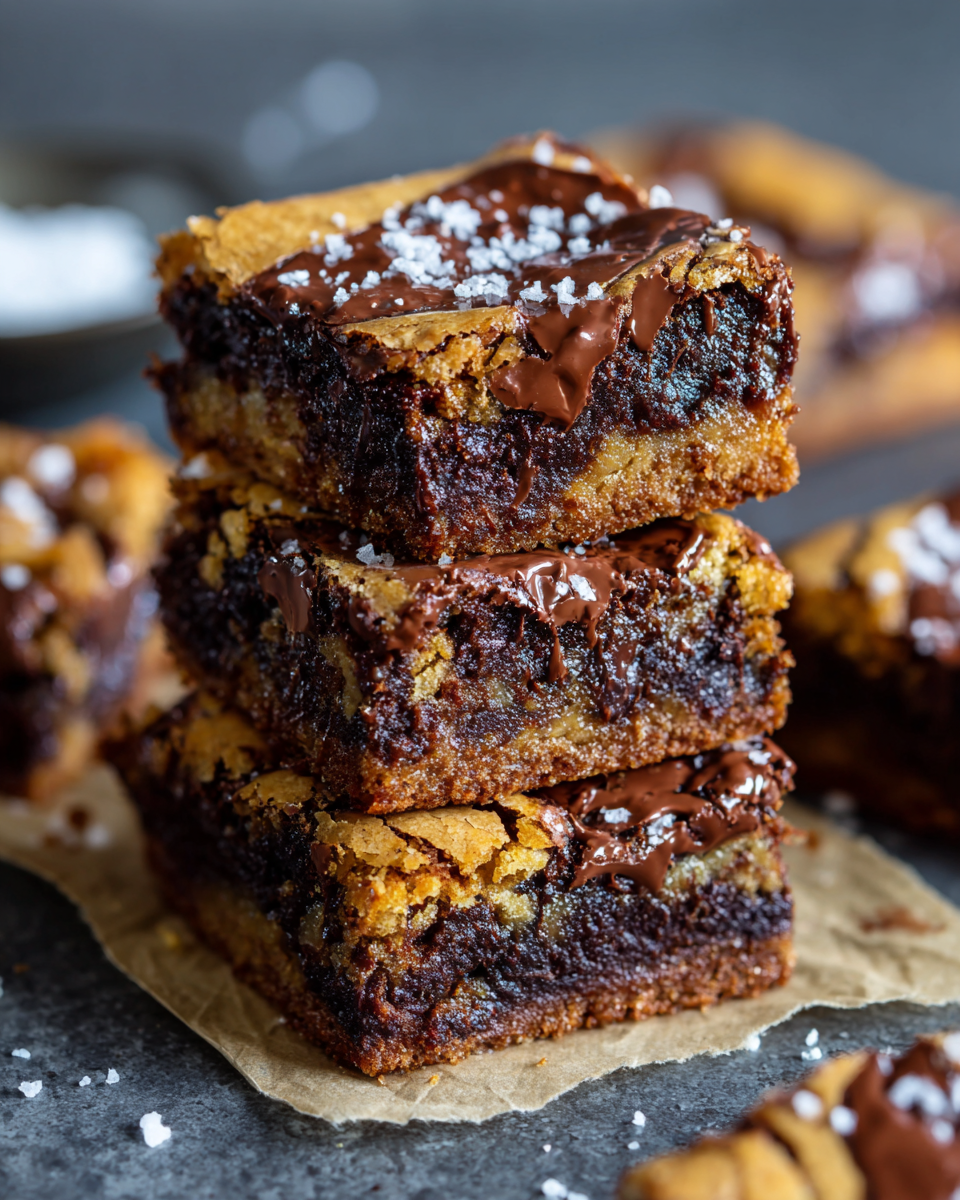
The Best Fudgy Chewy Browkies – Ultimate Chocolate Brownie Cookie Recipe
There’s something magical that happens when you combine the rich, decadent texture of a brownie with the delightful chewiness of a cookie. Welcome to the world of browkies – the ultimate chocolate dessert that gives you the best of both worlds! As someone who has spent years perfecting chocolate recipes, I can confidently say this browkie creation might just become your new favorite treat.
What Makes These Browkies So Special
These aren’t just ordinary cookies or simple brownies. Our browkies achieve that perfect balance between fudgy brownie richness and cookie-like chewiness that so many bakers strive for. The secret lies in the careful combination of ingredients and techniques that we’ve perfected through countless test batches. When you bite into one of these chocolate wonders, you’ll experience a crackly top giving way to a soft, chewy interior that melts in your mouth.
The Perfect Browkie Ingredients
Creating exceptional browkies starts with quality ingredients. Let’s talk about why each component matters so much in achieving that perfect texture and flavor. The dark chocolate forms the foundation – using a good quality chocolate with around 70% cocoa content gives these browkies their deep, rich flavor without being overly sweet.
The combination of caster sugar and Demerara sugar is another crucial element. Caster sugar dissolves quickly, helping create that beautiful crackled top, while Demerara sugar contributes to the chewiness and adds a subtle caramel note. Using room temperature eggs is non-negotiable – they whip up much better, creating the airy structure that gives these browkies their signature light-yet-dense texture.
Step-by-Step Browkie Mastery
Preheating your oven properly is the first step to browkie success. Setting it to 160°C with fan or 170°C conventional ensures even baking without burning the bottoms. While the oven heats up, line your baking tray with parchment paper – this simple step prevents sticking and makes cleanup a breeze.
The chocolate melting process requires patience and care. Using the double boiler method (bowl over simmering water) ensures gentle, even melting without scorching the chocolate. Stirring occasionally and adding the vanilla at the end creates a smooth, fragrant base for our browkie batter.
Whipping the eggs and sugars is where the magic really happens. Using an electric hand whisk on high speed for about five minutes transforms the mixture from thin and liquidy to thick, pale, and incredibly fluffy. This step incorporates air that will give our browkies their characteristic lightness.
Sifting the dry ingredients might seem like an extra step, but it’s absolutely essential for lump-free batter. Combining flour, cocoa powder, baking powder, and salt beforehand ensures even distribution throughout the batter. Adding chocolate chips to the dry mix helps prevent them from sinking to the bottom during baking.
The Art of Gentle Folding
This is perhaps the most delicate part of the process. When combining the melted chocolate with the whipped eggs, use a gentle folding motion with a spatula. The goal is to maintain as much air as possible while ensuring thorough incorporation. Think of it as gently hugging the mixtures together rather than aggressively stirring.
Adding the dry ingredients requires the same careful approach. Fold just until you no longer see streaks of flour – overmixing at this stage will deflate all that beautiful air you worked so hard to incorporate. The batter should be thick but still light and airy.
Baking to Perfection
Scooping the batter onto your prepared tray is both an art and a science. Using a tablespoon measure helps create uniform browkies that bake evenly. Space them well apart – about 2-3 inches between each – to account for spreading. These browkies need room to develop their characteristic shape.
The baking time of 12-14 minutes might seem short, but it’s exactly what creates that perfect texture. You’re looking for set edges with a crackly top that still feels slightly soft to the touch. The browkies will continue to set as they cool on the baking tray.
The Finishing Touch
As soon as your browkies come out of the oven, consider sprinkling them with a pinch of sea salt. This contrast between sweet chocolate and savory salt elevates the flavor profile beautifully. Letting them cool on the baking tray for about 10 minutes allows them to set properly before transferring to a cooling rack.
Patience is key here – while it’s tempting to dig in immediately, allowing them to cool completely ensures the perfect chewy texture. The wait is absolutely worth it when you experience that first bite of perfectly balanced chocolate goodness.
Troubleshooting Common Browkie Issues
If your browkies spread too much, your oven might be running too hot, or your butter might have been too warm. If they’re too cakey, you might have overmixed the batter or baked them too long. Achieving that perfect fudgy-chewy balance takes practice, but following these steps closely will set you up for success.
Remember that oven temperatures can vary, so your first batch might require some adjustment. Keep notes on what works best with your specific oven – this personalized approach will help you achieve browkie perfection every time.
Serving and Storage Suggestions
These browkies are fantastic served slightly warm with a glass of cold milk or a scoop of vanilla ice cream. They also make incredible gifts – package them in cute boxes or bags for friends and family. For storage, keep them in an airtight container at room temperature for up to five days.
If you want to enjoy them warm again, a quick 10-second zap in the microwave will restore that fresh-from-the-oven warmth. They also freeze beautifully – just wrap individually and thaw at room temperature when needed.
Why These Will Become Your Go-To Recipe
What sets this browkie recipe apart is its reliability and incredible results. The combination of techniques – from proper egg whipping to gentle folding – creates a texture that’s truly special. Whether you’re baking for a special occasion or just craving something chocolatey, these browkies deliver every time.
I’ve shared this recipe with countless friends and students, and the feedback is always the same – these are the best chocolate treats they’ve ever made. The joy of creating something so delicious from simple ingredients is what baking is all about.
So preheat that oven, gather your ingredients, and get ready to experience browkie perfection. Your kitchen will smell amazing, and your taste buds will thank you. Happy baking!
The Best Fudgy Chewy Browkies (Brookies)
Ingredients
Equipment
Method
- Preheat oven to 160°C fan or 170°C conventional and line baking tray with parchment paper
- Melt dark chocolate and butter using double boiler method, then stir in vanilla
- Whip eggs and sugars with electric whisk for 5 minutes until light, thick and fluffy
- Sift together flour, cocoa powder, baking powder, salt and mix in chocolate chips
- Gently fold melted chocolate mixture into whipped eggs and sugars
- Carefully fold dry ingredients into wet mixture until just combined
- Scoop tablespoon portions onto baking tray and bake for 12-14 minutes
- Remove from oven, sprinkle with sea salt if desired, cool on tray then rack