How to Make Pita Bread at Home Like a Pro: A Foolproof Guide to Perfect Pockets
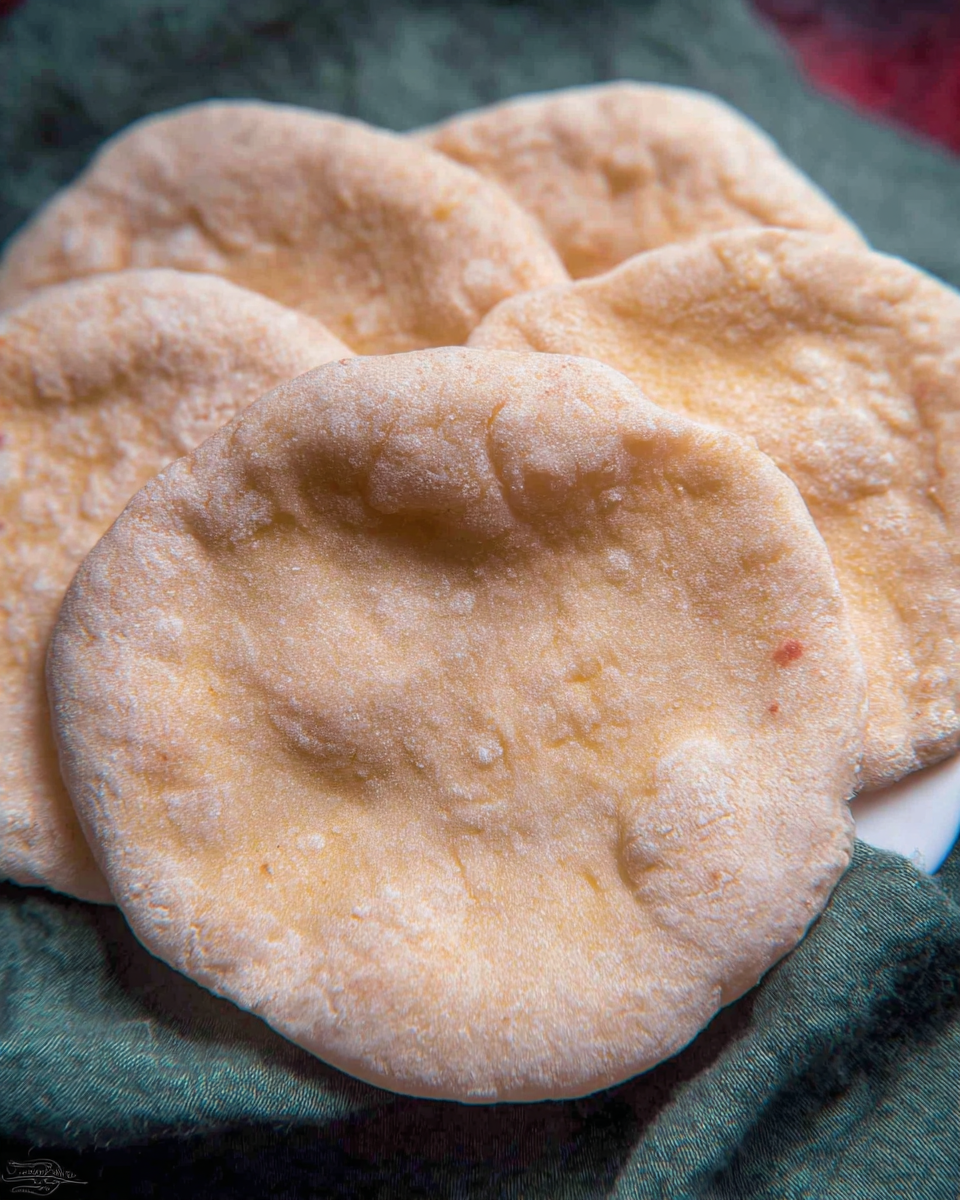
There’s something truly magical about watching a simple ball of dough transform into a perfectly puffed pita bread right before your eyes. The satisfaction of creating your own soft, warm pita bread at home is unmatched, and today I’m sharing my family’s authentic recipe that will have you baking like a pro in no time. This isn’t just any pita bread recipe – it’s the one that’s been perfected through generations, creating those beautiful pockets that are perfect for stuffing with your favorite fillings.
Why Homemade Pita Bread Beats Store-Bought Every Time
When you make pita bread at home, you’re not just baking bread – you’re creating an experience. The aroma that fills your kitchen as these golden rounds puff up in the oven is enough to make anyone’s mouth water. Unlike store-bought versions that can be dry and lackluster, homemade pita bread has a fresh, slightly chewy texture and that unmistakable warmth that only comes from baking with love. Plus, you control the ingredients, so you can make adjustments to suit your dietary preferences or simply use the highest quality ingredients available.
The Secret to Perfect Pita Dough
The foundation of incredible pita bread lies in the dough. Our recipe uses a simple sponge method that gives the yeast a head start, ensuring your dough rises beautifully. Lukewarm water activates the yeast perfectly, while just a touch of sugar provides the fuel it needs to work its magic. The combination of all-purpose flour creates that classic pita texture, but you can easily substitute half with whole wheat flour for a nuttier flavor and extra nutrition.
What makes this recipe truly special is the attention to detail. The olive oil not only adds flavor but also contributes to that soft, pliable texture that makes pita bread so delightful. And when it comes to salt, using quality kosher salt makes all the difference in bringing out the full flavor profile of your homemade bread.
Step-by-Step Pita Bread Mastery
Creating the perfect pita dough is surprisingly straightforward. Start by combining lukewarm water with yeast and sugar, then whisk in some flour to create a loose sponge. This initial step gives your yeast the perfect environment to activate and start working its magic. After about 15 minutes, you’ll see those beautiful bubbles forming – that’s your signal that everything is working perfectly.
Next, add your salt, olive oil, and the remaining flour. The dough will look shaggy at first, but that’s exactly what you want to see. A little kneading brings everything together into a smooth, elastic dough that’s ready for its first rise. The key here is patience – let the dough rest periodically during kneading to allow the gluten to develop properly.
The Magic of the Rise
After kneading, your dough needs time to work its magic. Place it in an oiled bowl, cover it tightly, and find a warm spot in your kitchen. Watching the dough double in size is one of the most satisfying parts of bread-making. This rise is crucial for developing flavor and creating those air pockets that will later transform into the characteristic pita pocket.
Once risen, gently deflate the dough and divide it into equal portions. This is where you get to shape your future pitas into perfect little balls. Let them rest again – this short rest period allows the gluten to relax, making the dough much easier to roll out into those perfect circles.
Rolling and Baking Techniques
Rolling out pita dough requires a light touch and patience. Use a floured rolling pin to create circles about 8-9 inches wide and a quarter-inch thick. The secret here is to lift and turn the dough frequently to prevent sticking. If the dough starts to spring back, give it a few minutes to rest before continuing. This patience pays off in perfectly shaped pitas.
Now comes the exciting part – baking! You have two excellent options: oven baking or stovetop cooking. Both methods produce fantastic results, so you can choose based on your preference or equipment availability.
Oven Baking Method
For oven baking, preheat your oven to 475 degrees Fahrenheit with a heavy baking pan or cast iron skillet inside. The hot surface is key to creating that instant puff. Place your rolled-out pitas directly on the hot surface and bake for 2 minutes on the first side, then flip and bake for 1 minute more. The transformation is magical – watch as they puff up into perfect pockets right before your eyes!
As you bake subsequent batches, keep the finished pitas covered with a clean towel. This helps them stay soft and warm, ready for serving. The oven method typically produces the most consistent puffing, making it ideal for those perfect pocket sandwiches.
Stovetop Cooking Method
If you prefer stovetop cooking, heat a cast iron skillet over medium-high heat. Test the temperature by sprinkling a few water droplets – they should sizzle immediately. Add just a tiny bit of olive oil and wipe off any excess. Cook each pita for about 30 seconds until bubbles form, then flip and cook for 1-2 minutes per side.
The stovetop method creates beautifully toasted spots and a slightly different texture that many people love. While the puffing might not be as dramatic as in the oven, you can encourage pocket formation by gently pressing the surface with a clean towel during cooking.
Creative Ways to Enjoy Your Homemade Pita
Fresh pita bread is incredibly versatile. Beyond the classic stuffed sandwiches, try cutting them into wedges and baking for homemade pita chips, or use them as the base for personal pizzas. They’re perfect for dipping in hummus, tearing into soups, or creating creative family dinners like stuffed pocket meals.
For a complete Mediterranean feast, pair your homemade pita with fresh salads and other baked goods. The possibilities are endless, and once you taste the difference homemade makes, you’ll find yourself reaching for this recipe again and again.
Pro Tips for Pita Perfection
Temperature is everything when making pita bread. Ensure your water is truly lukewarm (about 105-115°F) to activate the yeast properly without killing it. If your kitchen is cool, create a warm rising spot by placing the bowl in an unheated oven with the light on, or near (not on) a warm stove.
Don’t be discouraged if your first few pitas don’t puff perfectly. Like any skill, pita-making improves with practice. The key is consistent thickness when rolling and proper heat during baking. Even if they don’t puff, they’ll still taste delicious – sometimes the imperfect ones become our family’s favorites for dipping!
Storing and Reheating Your Pita Bread
Fresh pita bread is best enjoyed warm from the oven, but it stores beautifully too. Cool completely before storing in an airtight container at room temperature for up to 3 days. For longer storage, freeze them in freezer bags – they reheat perfectly in a toaster or warm oven.
To revive day-old pita, sprinkle with a little water and warm in a 350°F oven for 5-7 minutes, or microwave briefly between damp paper towels. The steam helps restore that fresh-baked softness that makes homemade pita so special.
More Bread-Making Adventures
Once you’ve mastered pita bread, you might find yourself falling in love with homemade bread making. The same basic principles apply to many other breads, from perfect pizza dough to artisan loaves. Each bread has its own personality and techniques, but the satisfaction of creating something delicious from simple ingredients remains the same.
Bread making connects us to centuries of culinary tradition while allowing for personal creativity. Whether you’re making pita for a weeknight dinner or for a special gathering, the process itself becomes part of the enjoyment. The rhythm of kneading, the anticipation of the rise, and the magic of the puff – these are the moments that turn cooking into an art form.
So gather your ingredients, clear your counter, and get ready to experience the joy of homemade pita bread. With this pro-level recipe and techniques, you’re not just making bread – you’re creating memories, one perfect puff at a time.
How to make Pita Bread at home like a Pro
Ingredients
Equipment
Method
- In a large mixing bowl, combine lukewarm water with yeast and sugar until dissolved. Add 1/2 cup flour and whisk together. Let sit in a warm place uncovered for 15 minutes until bubbling.
- Add salt, olive oil, and most of remaining flour. Stir until shaggy mass forms. Dust with flour and knead in bowl for 1 minute.
- Knead on floured surface for a few minutes until smooth. Cover and let rest 10 minutes, then knead again for a couple more minutes.
- Place dough in oiled bowl, turn to coat, cover tightly with plastic wrap and towel. Let rise in warm place for 1 hour until doubled.
- Deflate dough and divide into 7-8 equal balls. Cover with towel and let rest 10 minutes.
- Roll each ball into 8-9 inch circles about 1/4 inch thick, lifting and turning dough to prevent sticking.
- For oven method: Preheat to 475°F with baking pan/skillet. Bake 2 minutes per side on hot surface until puffed.
- For stovetop: Heat cast iron skillet, cook 30 seconds until bubbles form, flip and cook 1-2 minutes per side until toasted spots appear.