Irresistible Molten Red Velvet Cakes with Creamy Topping
Why Make This Recipe
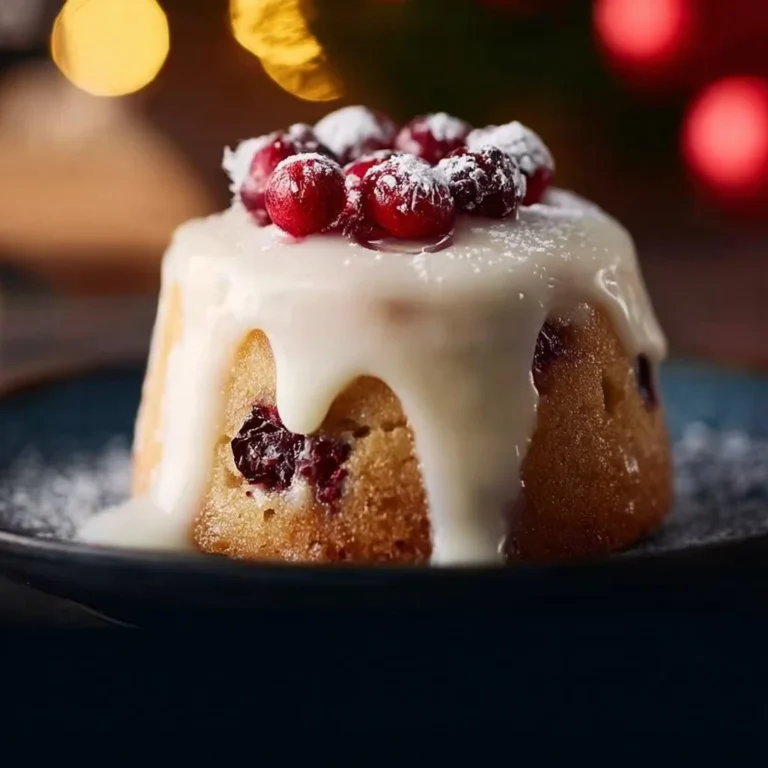
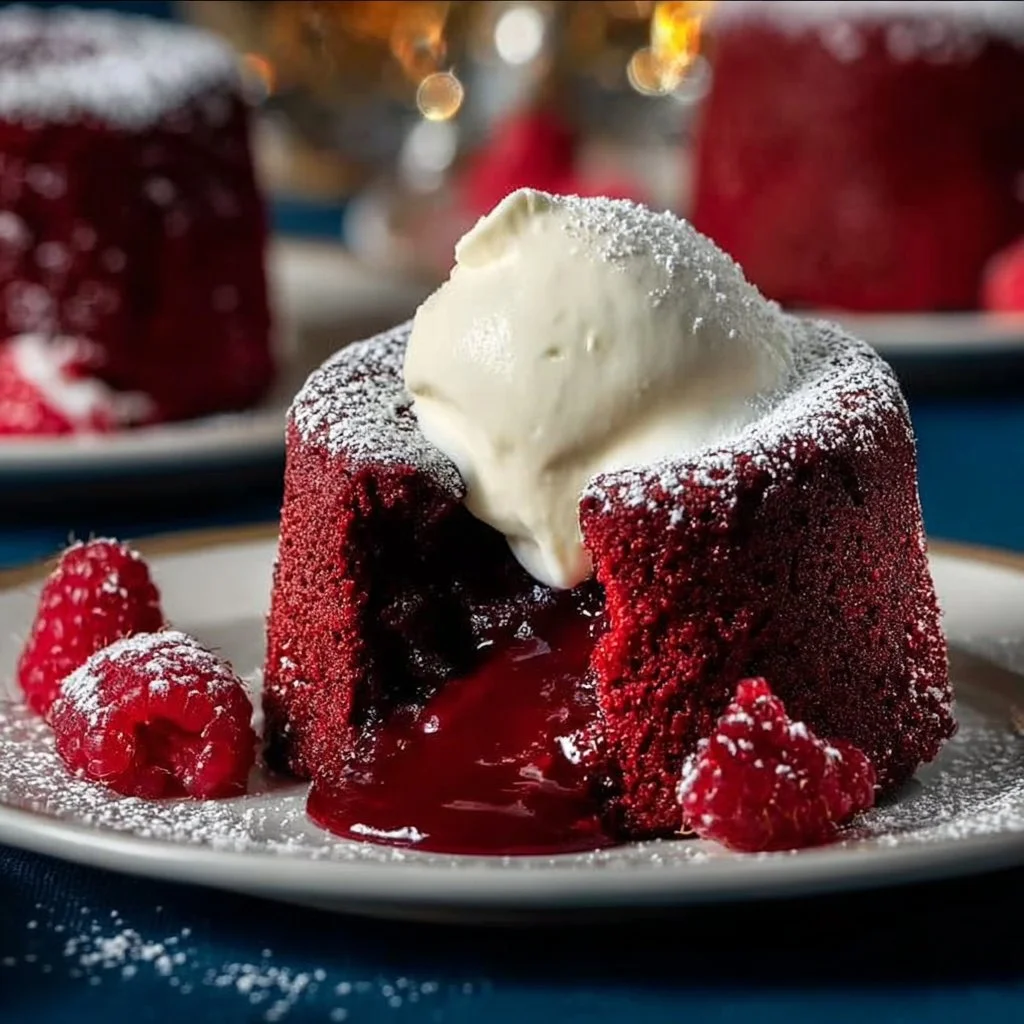
Molten Red Velvet Cakes with Creamy Topping is a dessert that captures the hearts of all dessert lovers. It’s not just about the flavors but also the visual appeal of the deep red color combined with the rich taste of chocolate. These little cakes provide an explosion of flavors that leaves a lasting impression. The molten center oozes out as you cut into the cake, while the creamy topping adds a smooth finish that perfectly complements the rich texture and taste of red velvet.
Additionally, this recipe is straightforward and fun to make. Whether you’re preparing for a special occasion or simply craving something sweet, this dessert meets all your needs. It’s perfect for impressing guests or enjoying a cozy night at home.
How to Make Irresistible Molten Red Velvet Cakes with Creamy Topping
Creating these delightful cakes includes several simple steps. The time and effort spent will surely be worth the delicious outcome! Below is a detailed guide on how you can whip up these delightful molten cakes.
Ingredients
For the Molten Red Velvet Cakes:
- 4 oz Semisweet chocolate baking bar (finely chopped)
- 1/2 cup Heavy cream
- 1/2 cup Cake flour
- 2 tbsp Unsweetened cocoa (plus extra for dusting)
- 1 tsp Baking soda
- 1/4 tsp Salt
- 1/4 cup Salted butter (melted)
- 1/2 cup Granulated sugar
- 1/4 cup Buttermilk
- 1 tbsp Red liquid food coloring
- 1 tsp Vanilla extract
- 1 tsp Apple cider vinegar
- 1 large Egg yolk
For the Creamy Topping:
- 4 oz Cream cheese (softened)
- 1/4 cup Powdered sugar
- 1 tsp Vanilla extract
- 1/2 cup Heavy cream (whipped)
Directions
Preparation
-
Preheat Your Oven: Start by preheating your oven to 425°F (220°C). Make sure your oven is fully heated to ensure even baking.
-
Prepare the Ramekins: Take four ramekins and grease them with butter. Dust a little unsweetened cocoa powder inside each ramekin to prevent sticking.
-
Melt the Chocolate: In a microwave-safe bowl, combine the chopped semisweet chocolate and half a cup of heavy cream. Microwave in 30-second intervals, stirring after each interval until the mixture is smooth and well combined.
-
Mix the Dry Ingredients: In a separate bowl, whisk together the cake flour, unsweetened cocoa powder, baking soda, and salt. Set aside.
-
Combine Wet Ingredients: In another large mixing bowl, combine the melted butter and granulated sugar. Mix until well blended. Next, add the buttermilk, red liquid food coloring, vanilla extract, apple cider vinegar, and egg yolk to the bowl. Stir until smooth.
-
Combine All Ingredients: Gradually add the dry ingredients into the wet mixture. Pour in the melted chocolate and heavy cream mixture. Stir everything until just combined. Be careful not to overmix.
-
Pour Into Ramekins: Divide the batter evenly among the greased ramekins. Each should be filled about three-quarters full.
-
Bake: Place the ramekins on a baking sheet and bake in the preheated oven for about 12-15 minutes until the edges are firm but the center is still soft. Keep an eye on them, as you want the middle to be perfectly gooey.
-
Cool Slightly: Remove the cakes from the oven and let them cool in the ramekins for 1-2 minutes.
-
Unmold: Carefully run a knife around the edges of the ramekins to loosen the cakes. Invert each ramekin onto a plate and tap slightly to release the cakes.
Make the Creamy Topping
-
Mix the Cream Cheese: In a medium bowl, mix the softened cream cheese until smooth and creamy.
-
Add Sweetness: Gradually add the powdered sugar and vanilla extract. Stir until fully combined and smooth.
-
Fold in Whipped Cream: Gently fold in the whipped cream to the cream cheese mixture. This adds a light and airy quality that will enhance the topping.
How to Serve Irresistible Molten Red Velvet Cakes with Creamy Topping
To serve your Irresistible Molten Red Velvet Cakes, place each cake on a dessert plate. Add a generous scoop of your creamy topping right on top of the cake. You can also dust some extra cocoa powder or top it with chocolate shavings for added elegance. Fresh berries on the side—like raspberries or strawberries—can bring in a nice contrast and extra flavor.
These molten cakes are best enjoyed freshly baked, as the gooey center is at its most delightful texture. Present them warm, and watch as smiles spread across your guests’ faces when they dive in.
How to Store Irresistible Molten Red Velvet Cakes
If you have leftover cakes (though they are hard to resist), allow them to cool completely. Cover each ramekin with foil or plastic wrap and store them in the refrigerator. They can be kept in the fridge for up to three days.
To reheat, simply place the ramekins in a preheated oven at 350°F (175°C) for about 5-7 minutes until warmed through. This will help revive that gooey center, making your molten red velvet cakes taste almost freshly baked!
Tips to Make Irresistible Molten Red Velvet Cakes
-
Be Precise with Baking Time: Baking time is crucial. Too little time means a more liquid center, while too much will turn them into regular red velvet cakes. Keep an eye on them and test for doneness.
-
Use Good Quality Chocolate: The chocolate flavor is key. A high-quality semisweet chocolate will enrich the flavor of your molten cakes.
-
Room Temperature Ingredients: Ensure that your eggs and cream cheese are at room temperature. This helps in mixing ingredients more smoothly and achieving a better texture.
-
Experiment with Toppings: Don’t hesitate to add your twist. Besides the creamy topping, you can drizzle chocolate sauce, caramel sauce, or even whip some cream with a splash of vanilla extract to serve.
Variation
For those who want to add a creative twist to their molten cakes, consider adding some spices like cinnamon or a splash of espresso powder to enhance the flavors. You may also try using white chocolate instead of semisweet chocolate for a different taste profile. If you prefer a layer of fruit, try adding a layer of raspberry or strawberry puree at the bottom of the ramekin before adding the batter. It will provide a fruity explosion when you cut into the cake.
FAQs
1. Can I make the batter ahead of time?
Absolutely! You can prepare the cake batter ahead of time and store it in the refrigerator for up to a day. When you’re ready to bake, just bring the batter to room temperature before pouring it into your ramekins and baking.
2. Can I freeze the molten cake?
While it’s best to enjoy them fresh, you can freeze the batter before baking. Just spoon the batter into greased ramekins and cover tightly with foil or plastic wrap. When you want to bake them, simply remove from the freezer and bake without thawing.
3. What should I serve with molten red velvet cakes?
These cakes are divine on their own but can be paired with vanilla ice cream, fresh berries, or a drizzle of chocolate or caramel sauce for added flavor. A dash of whipped cream makes the presentation even prettier.
4. What happens if the cakes cool down?
If the cakes cool down completely, the molten center will firm up. You can reheat them gently in the oven to regain that gooey texture.
5. Can I make mini versions of these cakes?
Yes! You can make mini versions using muffin tins. Just adjust the baking time accordingly, starting with about 8-10 minutes, and watch closely.
Indulging in these Irresistible Molten Red Velvet Cakes with a creamy topping can make any day feel like a special occasion. The combination of flavors and textures creates a dessert that is decadent yet easy to prepare at home. Grab your ingredients, follow the steps, and treat yourself and your loved ones to a delightful culinary experience! Enjoy!
PrintIrresistible Molten Red Velvet Cakes with Creamy Topping

A delightful dessert of molten red velvet cakes with a creamy topping, perfect for special occasions or a cozy night at home.
- Prep Time: 15 minutes
- Cook Time: 15 minutes
- Total Time: 30 minutes
- Yield: 4 servings 1x
- Category: Dessert
- Method: Baking
- Cuisine: American
- Diet: Vegetarian
Ingredients
- 4 oz Semisweet chocolate baking bar, finely chopped
- 1/2 cup Heavy cream
- 1/2 cup Cake flour
- 2 tbsp Unsweetened cocoa (plus extra for dusting)
- 1 tsp Baking soda
- 1/4 tsp Salt
- 1/4 cup Salted butter, melted
- 1/2 cup Granulated sugar
- 1/4 cup Buttermilk
- 1 tbsp Red liquid food coloring
- 1 tsp Vanilla extract
- 1 tsp Apple cider vinegar
- 1 large Egg yolk
- 4 oz Cream cheese, softened
- 1/4 cup Powdered sugar
- 1 tsp Vanilla extract
- 1/2 cup Heavy cream, whipped
Instructions
- Preheat your oven to 425°F (220°C).
- Grease four ramekins with butter and dust with cocoa powder.
- Melt chocolate with heavy cream in the microwave, stirring until smooth.
- Whisk together cake flour, cocoa powder, baking soda, and salt in a separate bowl.
- In another bowl, blend melted butter and granulated sugar, then add buttermilk, food coloring, vanilla, vinegar, and egg yolk. Stir until smooth.
- Gradually add dry ingredients to wet mixture, then stir in melted chocolate until just combined.
- Divide batter among ramekins, filling three-quarters full.
- Bake for 12-15 minutes until edges are firm but centers are soft.
- Cool in ramekins for 1-2 minutes, then invert onto plates.
- For creamy topping, mix cream cheese, powdered sugar, and vanilla until smooth, then fold in whipped cream.
- Serve cakes warm with creamy topping on top.
Notes
Store leftovers in the refrigerator for up to three days. Reheat in a preheated oven before serving.
Nutrition
- Serving Size: 1 serving
- Calories: 350
- Sugar: 25g
- Sodium: 300mg
- Fat: 20g
- Saturated Fat: 10g
- Unsaturated Fat: 8g
- Trans Fat: 0g
- Carbohydrates: 40g
- Fiber: 2g
- Protein: 5g
- Cholesterol: 70mg