Create the Ultimate Halloween Cheese Board for Spooky Fun
Why Make This Recipe
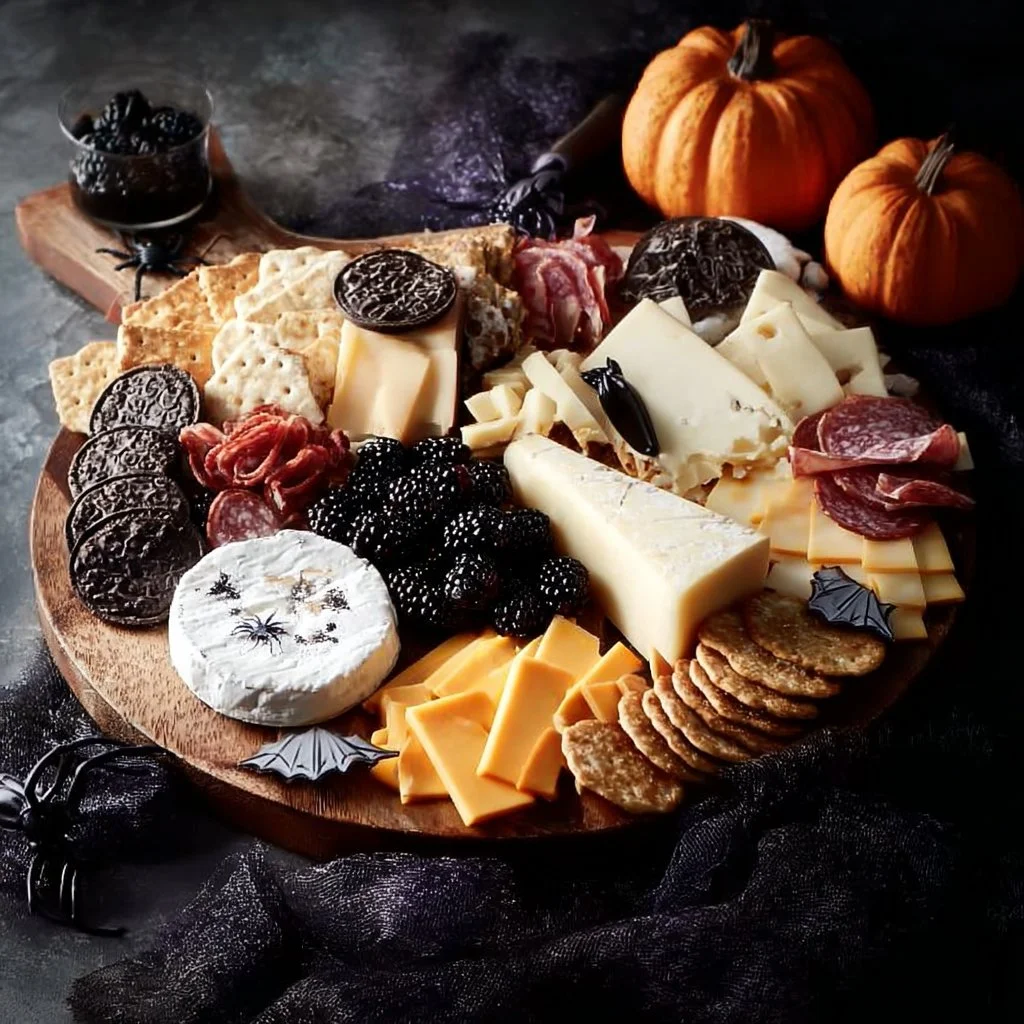
Halloween is a time for fun, creativity, and spooky treats, and there’s no better way to celebrate than with a festive cheese board. The Ultimate Halloween Cheese Board is not only a delicious choice for your gatherings but also a feast for the eyes. It brings together an assortment of flavors and textures that are sure to impress your guests.
This recipe is perfect because it allows for customization. You can add or swap out ingredients based on your preferences or dietary needs. The vibrant colors and playful decorations make it an exciting centerpiece at any Halloween party. Plus, a cheese board is a great way for guests to mingle while enjoying various flavors—all while keeping the mood festive and lighthearted.
How to Make the Ultimate Halloween Cheese Board
Building your Ultimate Halloween Cheese Board is straightforward and fun. Follow these steps to create a visually appealing and delicious spread that will be the highlight of your celebration.
Ingredients:
- 8 oz Irish Cheddar (Adds sharpness and a rich flavor; substitute with aged cheddar if unavailable.)
- 8 oz Merlot Bellavitano Cheese (Provides a unique flavor profile and adds color; swap with another semi-hard cheese if needed.)
- 8 oz Blue D’Avergne Cheese (Offers a tangy and creamy texture; replace with any mild blue cheese for a similar flavor.)
- 8 oz Goat Cheese Log (Adds creaminess and a subtle tart flavor; can be substituted with cream cheese if preferred.)
- 6 oz Peppered Salami (Provides a spicy and savory contrast; other cured meats like prosciutto work well too.)
- 1 box Whole Wheat Mini Toasts (Serve as a crunchy vessel for cheese and spreads; use any artisan crackers as an alternative.)
- 1 box Entertainment Crackers (Adds variety in texture; choose your favorite types of crackers.)
- 1 cup Cornichons (Bring acidity and crunch to balance the fatty cheeses; use pickles or olives if unavailable.)
- 8 oz Pear Jam (Sweet jarred spread that pairs beautifully with cheeses; honey can be used as a substitute.)
- 1 cup Black Olives (Adds briny flavor and decor; opt for green olives as an alternative.)
- 1 cup Fresh Mozzarella Balls (Used for decoration (eyeballs); you could use mozzarella pearls or cubes instead.)
- 2 cups Seasonal Fruits (Pomegranate, Bosc Pear, Blackberries)
- 1 cup Nuts (Praline Pecans, Almonds) (Add crunch and sweetness; swap for your preferred nuts.)
- 1 cup Dried Figs and Red Seedless Grapes (Enhance sweetness and texture; use dried apricots or raisins in their place.)
- 1 cup Candy Corn (A fun Halloween treat that heightens the festive look; use any seasonal candies for variety.)
- 1 package Puff Pastry (For wrapping the brie; store-bought pastry works best, or use pie crust if needed.)
- 1/4 cup Raspberry Jam (For the mummy’s filling; other fruit preserves can also be used.)
- 1 Egg and Water (Used for an egg wash to achieve golden pastry; optional for vegan versions.)
- 1 cup Candy Eyeballs (Decorative fun additions for the Mummy Brie; replace with chocolate chips if desired.)
Directions:
-
Prepare the Mummy Brie:
- First, preheat your oven to 400°F (200°C).
- Take the puff pastry and roll it out on a floured surface.
- Place the brie cheese in the center of the puff pastry. Spread the raspberry jam over the top of the brie.
- Wrap the pastry around the brie, pinching the seams to seal it. Cut extra pastry into thin strips and create a ‘bandage’ effect on top of the wrapped brie.
- If desired, beat the egg with a little water and brush it over the pastry for a golden finish.
-
Bake the Mummy Brie:
- Place the wrapped brie on a baking sheet lined with parchment paper. Bake for about 20-25 minutes or until the pastry is golden brown.
-
Prepare the Cheese Board:
- While the brie is baking, arrange your chosen cheeses on a large serving board or platter. Start with the larger items, like the blocks of cheddar and goat cheese.
- Slice the Irish Cheddar and Merlot Bellavitano cheese, and add them to the board. Crumble or cut the Blue D’Avergne cheese and place it next to the other cheeses.
- Next, slice the peppered salami into rounds and arrange them near the cheeses.
-
Add Crunch and Color:
- Fill the board with whole wheat mini toasts and entertainment crackers.
- Scatter cornichons around the cheeses for a pop of color and tanginess.
- Add the black olives and fresh mozzarella balls. Use the mozzarella balls sparingly to create ‘eyeballs’ for decoration.
-
Integrate Fruits and Nuts:
- Arrange seasonal fruits creatively around the board. Use pomegranates, Bosc pears, and blackberries to add vibrant colors.
- Sprinkle the praline pecans and almonds in various places for crunch and sweetness.
-
Finish with Sweet Treats:
- Place dried figs and red seedless grapes among the savory items for a nice contrast.
- Finally, scatter candy corn across the board for that Halloween touch and place candy eyeballs on the cheese as creepy decorations.
-
Bring it Together:
- Once the Mummy Brie is done baking, remove it from the oven and let it cool slightly before placing it on the board.
- Serve the Ultimate Halloween Cheese Board with plenty of toothpicks and serving utensils.
How to Serve the Ultimate Halloween Cheese Board
The best way to serve your Ultimate Halloween Cheese Board is to have it as a centerpiece at your Halloween gathering. Place it on a large table or countertop where guests can easily access and enjoy. Pair it with festive napkins and plates, ensuring each guest has something to nibble on as they mingle.
Encourage your guests to create their combinations by trying different cheese and accompaniment pairings. Offer fun suggestions like pairing the creamy goat cheese with figs or the spicy salami with a slice of aged cheese. This interactive aspect of the cheese board makes it even more enjoyable and encourages conversation.
How to Store the Ultimate Halloween Cheese Board
If you’re planning on preparing your cheese board ahead of time, it’s important to store it properly to maintain freshness. Here are some tips:
-
Refrigeration: Once prepared, cover the cheese board with plastic wrap or store it in an airtight container. Most cheeses are best kept in the refrigerator, but remember not to store them in the coldest part, as they can harden.
-
Separate Ingredients: If you plan to keep extras, store fruits, meats, and cheeses separately. This avoids unwanted mingling of flavors and maintains the different textures.
-
Timing: Aim to prepare your cheese board no more than a few hours before serving. This will help preserve the freshness and quality of all the ingredients.
Tips to Make the Ultimate Halloween Cheese Board
-
Balance Flavors: When selecting cheeses, include a variety of flavors, such as sharp, creamy, spicy, and tangy options. This will make each bite exciting.
-
Creative Arrangements: Use different heights and arrangements on your board to create visual interest. Stack items, use bowls for jams, or even add some decorations like miniature pumpkins.
-
Seasonal Touches: Incorporate seasonal ingredients to keep the theme cohesive. For instance, in autumn, you can add pomegranates, pears, and apples, which will fit nicely with the Halloween theme.
-
Economical Options: You can find similar flavors and textures in more budget-friendly cheeses and meats. Don’t hesitate to try new brands or local items at your grocery store.
-
Make it Interactive: Add small labels for each cheese and spread, so your guests know what they’re eating. This can spark interest and encourage conversation.
Variation
Feel free to customize your Ultimate Halloween Cheese Board by switching out ingredients based on what you have on hand or what is seasonally available. You could change the cheeses, swap out the meats, or replace fruits with other choices. The key is to maintain a balance of flavors, textures, and colors that fit the spooky spirit of Halloween.
FAQs
1. Can I make the cheese board in advance?
- Yes, you can prepare many of the ingredients ahead of time. However, try to assemble the board within a few hours of serving for the best texture and freshness.
2. What can I use instead of goat cheese?
- If you don’t have goat cheese, you can substitute it with cream cheese, ricotta, or even a soft cheese like Brie for a different twist.
3. Is there a vegan option for the cheeses?
- Absolutely! There are many store-bought vegan cheese options available. Also, plant-based spreads can replace cream cheese or goat cheese.
4. How can I make the board kid-friendly?
- For a kid-friendly version, replace the blue cheese with milder varieties and swap out any spicy meats with deli-style turkey or ham. You can also use fruits and candies they enjoy the most.
5. Can I use fresh herbs for decoration?
- Yes! Fresh herbs like rosemary or sage can add color and fragrance to your Halloween cheese board. They also work nicely for garnishing dishes.
By following these simple steps and tips, you’re set to create an Ultimate Halloween Cheese Board that will delight your guests and make your gathering unforgettable. Whether it’s for Halloween or any festive occasion, this cheese board offers a deliciously entertaining way to enjoy time with friends and family. Enjoy the spooky atmosphere and have fun celebrating the season!
PrintUltimate Halloween Cheese Board
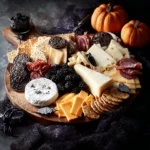
A visually appealing and delicious assortment of cheeses, meats, and seasonal fruits, perfect for Halloween gatherings.
- Prep Time: 20 minutes
- Cook Time: 25 minutes
- Total Time: 45 minutes
- Yield: 8 servings 1x
- Category: Appetizer
- Method: Baking
- Cuisine: American
- Diet: Vegetarian
Ingredients
- 8 oz Irish Cheddar
- 8 oz Merlot Bellavitano Cheese
- 8 oz Blue D’Avergne Cheese
- 8 oz Goat Cheese Log
- 6 oz Peppered Salami
- 1 box Whole Wheat Mini Toasts
- 1 box Entertainment Crackers
- 1 cup Cornichons
- 8 oz Pear Jam
- 1 cup Black Olives
- 1 cup Fresh Mozzarella Balls
- 2 cups Seasonal Fruits (Pomegranate, Bosc Pear, Blackberries)
- 1 cup Nuts (Praline Pecans, Almonds)
- 1 cup Dried Figs and Red Seedless Grapes
- 1 cup Candy Corn
- 1 package Puff Pastry
- 1/4 cup Raspberry Jam
- 1 Egg and Water
- 1 cup Candy Eyeballs
Instructions
- Preheat your oven to 400°F (200°C).
- Roll out puff pastry on a floured surface, place brie cheese in the center, and spread raspberry jam on top.
- Wrap the pastry around the brie and create a ‘bandage’ effect with extra pastry strips. Brush with egg wash if desired.
- Bake for 20-25 minutes or until golden brown.
- While baking, arrange cheeses on a serving board.
- Slice the cheeses and arrange them on the board with salami placed nearby.
- Add whole wheat mini toasts, cornichons, black olives, and fresh mozzarella balls for decoration.
- Fill in gaps with seasonal fruits and nuts for crunch.
- Finish with dried figs, red seedless grapes, candy corn, and candy eyeballs.
- Once Mummy Brie is done baking, cool slightly before placing on the board.
- Serve with toothpicks and utensils for easy access.
Notes
Customize the cheese board by swapping ingredients based on seasonal availability or personal preferences. Include small labels for each item to enhance the experience.
Nutrition
- Serving Size: 1 serving
- Calories: 600
- Sugar: 15g
- Sodium: 750mg
- Fat: 40g
- Saturated Fat: 15g
- Unsaturated Fat: 20g
- Trans Fat: 0g
- Carbohydrates: 55g
- Fiber: 5g
- Protein: 20g
- Cholesterol: 70mg