Peanut Butter Ball Pumpkins & Cats
Why Make This Recipe
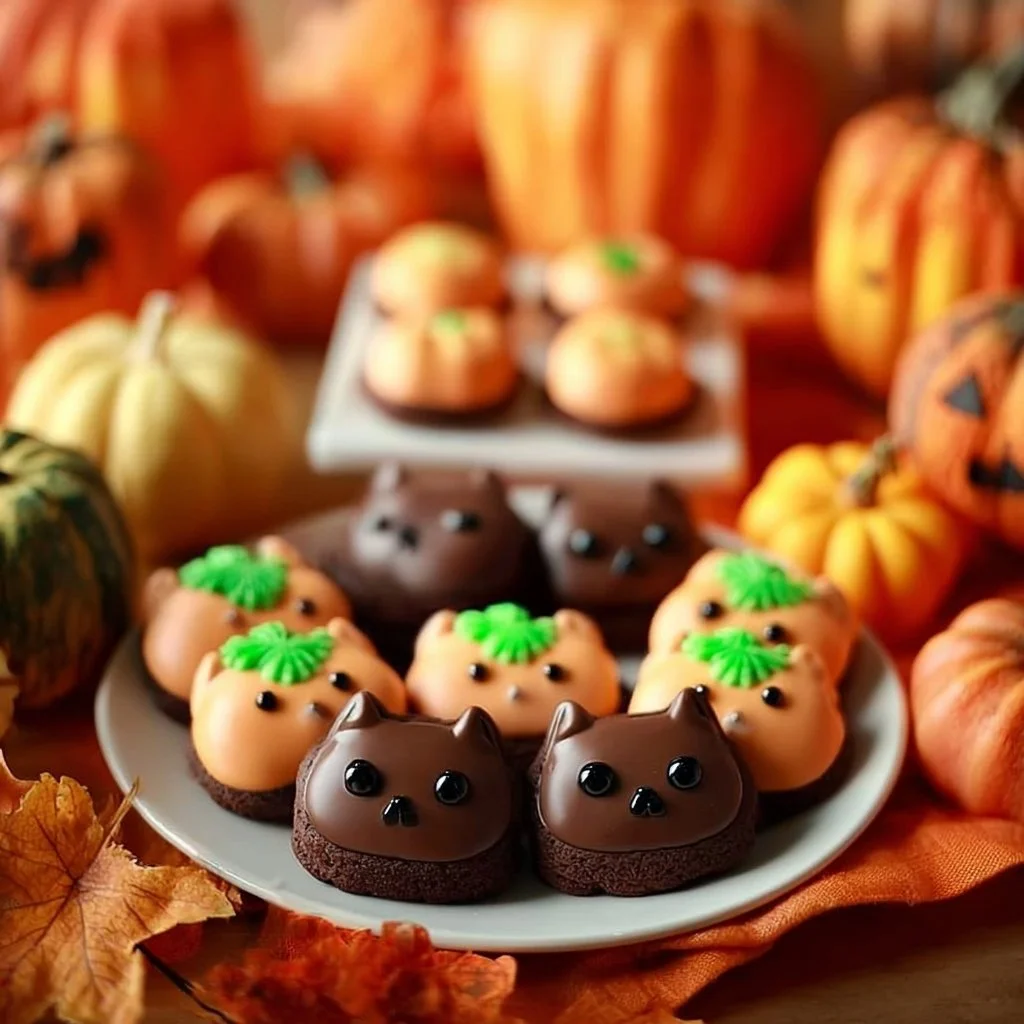
Peanut Butter Ball Pumpkins & Cats are not just a delightful treat; they are also a fun and engaging way to bring a little creativity into your kitchen. These adorable snacks are perfect for Halloween parties, fall gatherings, or simply to surprise family and friends with a special homemade treat. The cute shapes and colors will make people smile, and the combination of creamy peanut butter and chocolate is a flavor that everyone loves.
Making these treats is simple and fun! It’s a great activity to do with kids, teaching them not just about cooking but also a bit about decorating. Plus, they can enjoy tasting their creations afterward. This recipe is not only about making tasty snacks but also about enjoying the process and sharing laughter and fun in the kitchen.
How to Make Peanut Butter Ball Pumpkins & Cats
Now, let’s dive into the steps required to create these delightful Peanut Butter Ball Pumpkins & Cats. With just a handful of ingredients, you will be on your way to crafting a batch of these cute little treats that will amaze your family and friends.
Ingredients:
- 1 cup creamy peanut butter
- 3 cups powdered sugar
- 1 teaspoon vanilla extract
- 1 cup chocolate coating (melting chocolate or chocolate chips)
- Orange and black food coloring (optional for decoration)
- Mini chocolate chips or candies for eyes
Directions:
-
Mix Ingredients: Start by taking a mixing bowl and add in the creamy peanut butter, powdered sugar, and vanilla extract. Use a spatula or wooden spoon to mix these together until the mixture is smooth and well blended. It may take a little bit of muscle, but keep mixing until you can no longer see any powdered sugar.
-
Shape the Balls: Once the mixture is smooth, start shaping it into small balls. The size of the balls can vary, but around 1 inch in diameter usually works well. Form some of the balls into pumpkin shapes and others to look like cute little cats.
-
Melt the Chocolate: Next, take your chocolate coating (either melting chocolate or chocolate chips) and melt it in a microwave-safe bowl. You can also use a double boiler for this task. If using the microwave, heat it in short intervals, about 30 seconds at a time, stirring in between to ensure it does not burn.
-
Dip the Balls: After the chocolate is melted and smooth, it’s time to dip the peanut butter balls. Take each ball and coat it completely in the melted chocolate. Allow any excess chocolate to drip off before placing it on a piece of wax paper.
-
Cool and Set: Let the chocolate-coated balls cool and set on the wax paper. It usually takes about 30 minutes for the chocolate to harden at room temperature.
-
Decorate: If you want to add the fun food coloring, divide the remaining peanut butter mixture in half. Color one half orange for the pumpkins and leave the other half plain for the cats. Roll the treats in the colored peanut butter mixture to give them their charming appearance.
-
Add Eyes: Finally, take mini chocolate chips or small candies and attach them to the faces of your pumpkins and cats as eyes. Round and cute eyes will give personality to your little creatures.
-
Enjoy: Your Peanut Butter Ball Pumpkins & Cats are ready! Serve them as a spooky snack during Halloween or enjoy them anytime you crave a sweet treat.
How to Serve Peanut Butter Ball Pumpkins & Cats
Serving these treats is as simple as placing them on a decorative plate to show off their delightful forms. You can create a fun Halloween-themed presentation by throwing in some colored napkins or using a Halloween-themed platter. Arrange the pumpkin balls and cat balls in a playful way to make them even more appealing.
These treats can be enjoyed as sweet snacks at parties, or you can serve them individually in small muffin cups for an easy grab-and-go option. If you’re hosting a gathering or a playdate, setting them out on a dessert table can also prompt fun conversations and smiles.
Adding a cute sign that says “Peanut Butter Pumpkins & Cats” can also enhance the Halloween vibe for your spread. A few Halloween decorations, like small figurines, spider webs, or fun candy corn, around the plate can make it more festive.
How to Store Peanut Butter Ball Pumpkins & Cats
Once you have made a batch of these treats, you may want to store them to enjoy later. Here’s how to keep your Peanut Butter Ball Pumpkins & Cats fresh and tasty:
-
Refrigeration: These treats should be stored in the refrigerator, especially if you live in a warmer climate. The chocolate coating will keep well in the cold, and this will help maintain their shape. Place them in an airtight container to prevent them from drying out.
-
Room Temperature: If you plan to eat them within a few days, you can keep them at room temperature, but it’s best to put them in a cool, dry space away from sunlight. Again, make sure they are in an airtight container to maintain their freshness.
-
Freezer Option: If you want to store them for a longer period, you can freeze these treats. Place them in a single layer on a baking sheet to freeze them solid, then transfer them into a zip-top bag or freezer-safe container. Make sure to label the container with the date so you can keep track of them. They can be pulled out of the freezer and left to thaw in the fridge for a few hours before serving.
Tips to Make Peanut Butter Ball Pumpkins & Cats
-
Use Quality Ingredients: Using high-quality peanut butter and chocolate will enhance the flavor of your treats significantly. Good-quality chocolate will melt better and taste richer.
-
Chill the Mixture: If the peanut butter mixture seems too soft to shape, you can chill it for 15-30 minutes in the fridge. This will make it easier to form your balls without them falling apart.
-
Get Creative with Decorations: If you want to change things up, consider using colored icing instead of food coloring for the decorations. You can also use sprinkles or candy eyes for different effects.
-
Experiment with Flavors: If you’re not a fan of peanut butter, try substituting it with almond butter or cashew butter. The sweetness can also be adjusted by adding different extracts like almond or coconut.
-
Make Them Ahead of Time: These treats can be made a couple of days ahead of time, so it’s a great make-ahead option for parties or events.
Variation
If you’re looking to mix things up, here are some fun variations for your Peanut Butter Ball Pumpkins & Cats:
- Chocolate Chip Variation: Mix in mini chocolate chips into the peanut butter mixture for a crunchy texture surprise inside.
- Nut-Free Option: If you have nut allergies or want a nut-free version, you can substitute peanut butter with sunflower seed butter. This gives a similar consistency and taste.
- Add Pumpkin Spice: For an extra autumnal flavor, add a teaspoon of pumpkin spice to the mixture. This will amp up the fall flavors and enhance the pumpkin theme.
FAQs
Can I use crunchy peanut butter instead of creamy?
Yes, you can use crunchy peanut butter if you prefer a little texture in your treats. The consistency will change slightly, making the balls taste a bit more nutty.
How long do Peanut Butter Ball Pumpkins & Cats last?
When stored in the fridge, these treats can last up to one week. If frozen, they can last up to three months.
Can I make these treats vegan?
Yes! You can make them vegan by using vegan chocolate chips for the coating and ensuring that the powdered sugar does not contain animal-derived ingredients.
Do I need to use food coloring for decoration?
No, you do not have to use food coloring. The Peanut Butter Ball Pumpkins & Cats will still taste delicious without decoration. This step is just for fun!
Can I make these treats without chocolate?
Absolutely! If you want to skip the chocolate coating, you can simply roll the peanut butter balls in crushed graham crackers or colored sugar for a different look.
By following this simple recipe and the accompanying tips, you’re sure to create delightfully charming Peanut Butter Ball Pumpkins & Cats that everyone will adore. Whether for a party or just a family treat, their sweet taste and adorable appearance are sure to bring warmth and joy! Enjoy your cooking time in the kitchen and have fun crafting these festive snacks!
PrintPeanut Butter Ball Pumpkins & Cats
Delightful peanut butter snacks shaped like pumpkins and cats, perfect for Halloween and fun family cooking.
- Prep Time: 15 minutes
- Cook Time: 30 minutes
- Total Time: 45 minutes
- Yield: 12 servings 1x
- Category: Dessert
- Method: Chilling and Coating
- Cuisine: American
- Diet: Vegetarian
Ingredients
- 1 cup creamy peanut butter
- 3 cups powdered sugar
- 1 teaspoon vanilla extract
- 1 cup chocolate coating (melting chocolate or chocolate chips)
- Orange and black food coloring (optional for decoration)
- Mini chocolate chips or candies for eyes
Instructions
- Mix Ingredients: Combine peanut butter, powdered sugar, and vanilla extract in a mixing bowl until smooth.
- Shape the Balls: Form the mixture into small balls, shaping some into pumpkins and others into cats.
- Melt the Chocolate: Melt the chocolate coating in short intervals until smooth.
- Dip the Balls: Coat each ball completely in melted chocolate and allow excess to drip off.
- Cool and Set: Let chocolate-coated balls cool and harden on wax paper for about 30 minutes.
- Decorate: If desired, color half of the peanut butter mixture orange and roll treats to create pumpkin shapes.
- Add Eyes: Attach mini chocolate chips or candies as eyes to the shaped treats.
- Enjoy: Serve as a spooky snack during Halloween or enjoy anytime!
Notes
These treats can be stored in the fridge for up to a week or frozen for up to three months. Get creative with decorations and flavors.
Nutrition
- Serving Size: 1 serving
- Calories: 150
- Sugar: 20g
- Sodium: 100mg
- Fat: 7g
- Saturated Fat: 2g
- Unsaturated Fat: 4g
- Trans Fat: 0g
- Carbohydrates: 18g
- Fiber: 1g
- Protein: 3g
- Cholesterol: 0mg