The Ultimate Chewy Chocolate Chip Cookies Recipe
There’s something magical about the aroma of freshly baked chocolate chip cookies wafting through your kitchen. That warm, buttery scent mixed with melting chocolate creates an instant feeling of comfort and nostalgia. But not all cookies are created equal. Some turn out flat and crispy, while others become cakey and dry. What we’re after is that perfect balance: a cookie that’s crisp around the edges, chewy throughout, and delightfully gooey in the center.
After countless batches and careful experimentation, I’ve discovered the secrets to achieving chocolate chip cookie perfection. The recipe I’m sharing today represents years of tweaking and refining, combining professional baking techniques with home kitchen practicality. These are the cookies that disappear within minutes at family gatherings, the ones that earn you compliments for weeks afterward.
Why These Chocolate Chip Cookies Stand Out
What makes this recipe truly special isn’t just one ingredient or technique—it’s the combination of several carefully chosen elements working together. We’re using melted butter rather than softened butter, which creates a denser, chewier texture. The combination of granulated sugar and brown sugar provides both sweetness and moisture retention. But the real game-changers are the chocolate selection and the resting period.
Most recipes call for chocolate chips, but we’re taking it up a notch by using chocolate chunks. Chunks melt differently than chips, creating larger pools of molten chocolate throughout the cookie. Even more importantly, we’re mixing different types of chocolate—semisweet, milk, and dark—to create a complex flavor profile that evolves with every bite.
Ingredients That Make The Difference
Let’s talk about why each ingredient matters in creating the ultimate chocolate chip cookie. The half cup of granulated sugar provides structure and crispness, while the three-quarters cup of packed brown sugar contributes moisture and that signature chewiness. The salt isn’t just for flavor balance—it enhances all the other flavors and cuts through the sweetness.
The melted butter creates a denser dough that spreads less during baking, resulting in thicker cookies. Using one large egg binds everything together while adding richness. Don’t underestimate the vanilla extract—real vanilla adds warmth and depth that artificial extracts simply can’t match.
The flour-to-baking-soda ratio is crucial. Too much baking soda and your cookies will spread too thin; too little and they won’t spread enough. And then there’s the chocolate—the star of the show. Using chunks instead of chips means you get those beautiful chocolate pockets rather than uniform distribution.
Step-by-Step Cookie Perfection
Start by whisking together your sugars, salt, and melted butter until you achieve a smooth paste without lumps. This initial mixing is more important than you might think—it helps dissolve the sugars properly and creates the foundation for your cookie’s texture.
Next, whisk in the egg and vanilla. You’ll know you’re doing it right when the mixture forms light ribbons that hold their shape briefly before dissolving back into the bowl. This indicates proper emulsion, which is key to achieving that perfect cookie structure.
When sifting in the flour and baking soda, be gentle. Overmixing at this stage develops gluten, which can make your cookies tough and cake-like. Fold just until the dry ingredients disappear, then gently incorporate your chocolate chunks.
The Secret: Overnight Resting
This might be the hardest part of the recipe—waiting. Chilling the dough for at least 30 minutes is essential, but if you can manage to let it rest overnight, you’ll be rewarded with cookies that have developed incredible toffee-like flavors and a deeper color.
During this resting period, several magical things happen. The flour hydrates more completely, the flavors meld together, and the sugars caramelize more effectively during baking. The result is a cookie with complexity that store-bought versions simply can’t match.
Baking for Perfection
When you’re ready to bake, preheat your oven to 350°F (180°C). Use an ice cream scoop to portion your dough—this ensures uniform cookies that bake evenly. Leave plenty of space between them, as they will spread significantly.
Bake for 12-15 minutes, watching carefully for that perfect moment when the edges just begin to brown but the centers still look slightly underdone. This is the secret to achieving that gooey center we all love. The cookies will continue to set as they cool on the baking sheet.
Resist the temptation to eat them immediately! Let them cool completely—this allows the structure to set properly and intensifies the flavors. The waiting is tough, but the payoff is absolutely worth it.
Troubleshooting Common Cookie Problems
If your cookies spread too much, your butter might have been too warm or your oven temperature too low. If they don’t spread enough, your dough might have been too cold or contained too much flour. The perfect cookie requires finding that sweet spot where everything comes together harmoniously.
Remember that baking is both science and art. Oven temperatures vary, ambient humidity affects your dough, and personal preference plays a role in determining your ideal level of doneness. Don’t be afraid to make this recipe your own through experimentation.
Customizing Your Cookies
While this recipe is fantastic as written, there’s plenty of room for personalization. Try adding a half teaspoon of cinnamon for warmth, or mix in some toasted walnuts or pecans for crunch. You could even sprinkle a little sea salt on top before baking for that trendy salted chocolate combination.
The chocolate selection is another area for creativity. Try different combinations—maybe mostly dark chocolate with a few milk chocolate chunks, or vice versa. Each variation will give you slightly different results, allowing you to find your personal perfect cookie.
The Final Result
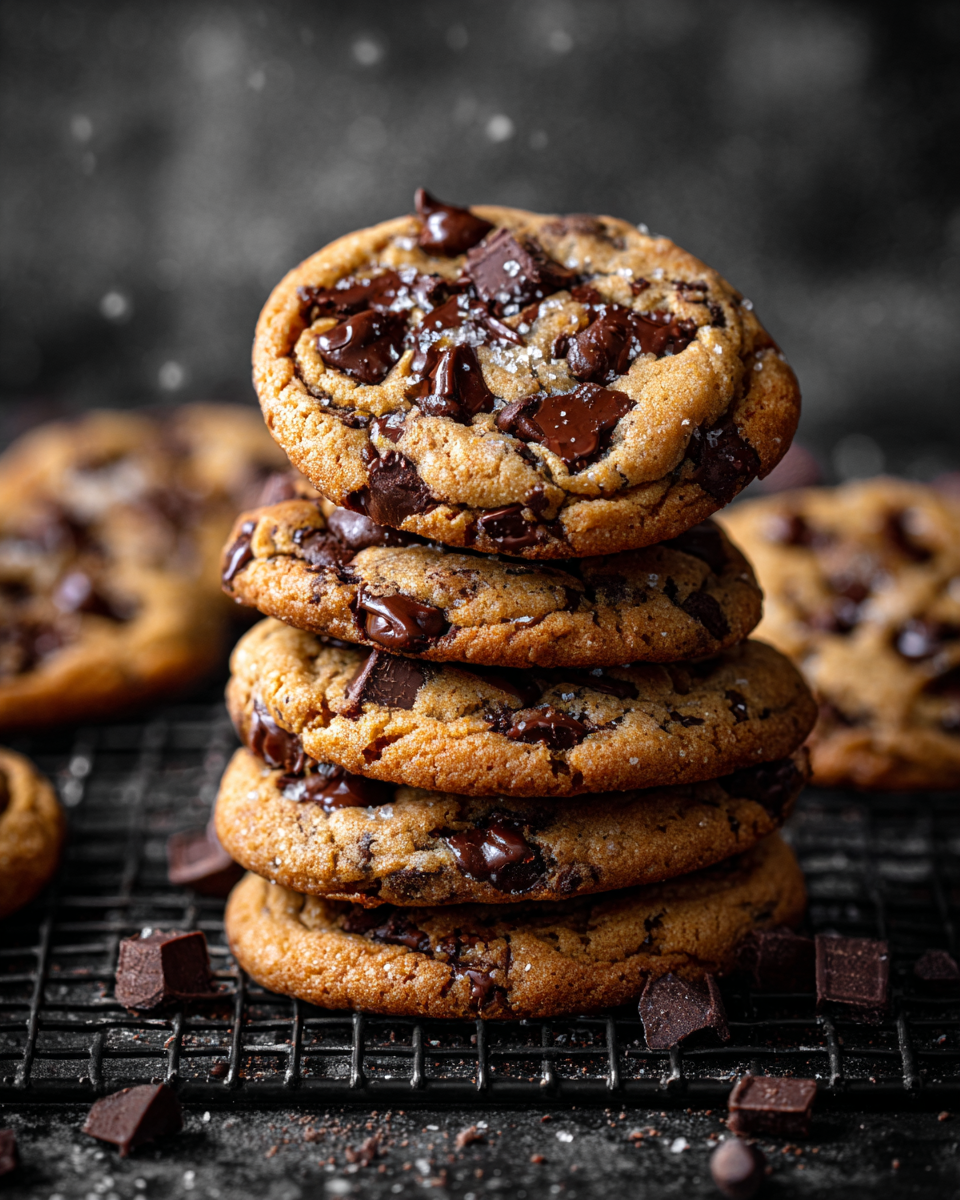
When you pull these cookies from the oven, you’ll understand why every careful step was necessary. That beautiful cracked surface, the tempting chocolate pools, the perfect golden-brown edges—it’s a sight that brings instant joy. The first bite confirms it: crisp exterior giving way to a chewy interior with pockets of molten chocolate.
These aren’t just cookies; they’re edible happiness. They’re the kind of treat that turns an ordinary day into something special. They’re perfect for sharing with loved ones, for celebrating small victories, or for simply treating yourself after a long week.
I hope this recipe brings as much joy to your kitchen as it has to mine. Happy baking!
The Best Chewy Chocolate Chip Cookies
Ingredients
Equipment
Method
- In a large bowl, whisk together the sugars, salt, and butter until a smooth paste forms with no lumps
- Whisk in the egg and vanilla, beating until light ribbons fall off the whisk and remain briefly before dissolving back into the mixture
- Sift in the flour and baking soda, then gently fold with a spatula until just combined (avoid overmixing to prevent gluten development)
- Fold in the chocolate chunks, then chill the dough for at least 30 minutes (overnight recommended for deeper flavor)
- Preheat oven to 350°F (180°C) and line a baking sheet with parchment paper
- Scoop dough with an ice cream scoop onto baking sheet, leaving 4 inches between cookies
- Bake for 12-15 minutes until edges just begin to brown
- Let cookies cool completely on baking sheet before serving