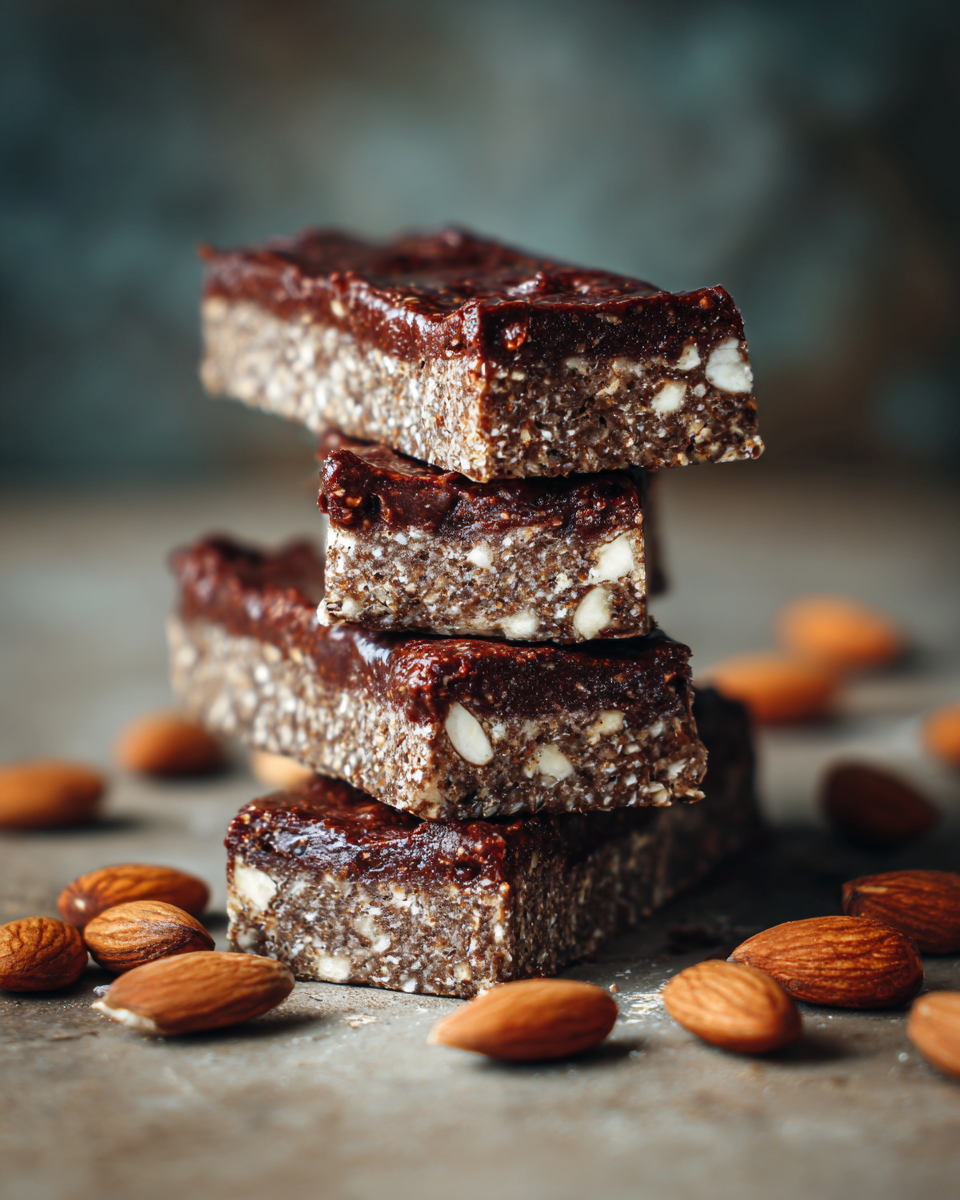
The Best Easy No Bake Protein Bar Recipe (Vegan, Gluten Free)
There’s something truly magical about creating homemade protein bars that nourish your body without ever turning on the oven. As someone who has tried countless store-bought protein bars only to be disappointed by their chalky texture and artificial aftertaste, I’ve perfected a recipe that celebrates simplicity and real ingredients. These no-bake protein bars are my go-to solution for busy mornings, afternoon slumps, and pre-workout fuel.
Why You’ll Love These No Bake Protein Bars
Imagine opening your refrigerator to find a batch of wholesome, chewy protein bars waiting for you. No fancy equipment required, no complicated techniques, just pure nutrition wrapped in deliciousness. What makes these bars so special is their versatility. Whether you’re vegan, gluten-free, or simply looking for a healthier snack alternative, this recipe adapts to your needs beautifully.
The beauty of no-bake recipes lies in their accessibility. You don’t need to be an experienced baker to create something extraordinary. With just a food processor and a few simple ingredients, you can whip up a batch of these protein-packed treats that will keep you satisfied for hours. The combination of dates, nut butter, and quinoa creates a texture that’s both chewy and substantial, unlike many store-bought alternatives that crumble disappointingly.
Ingredients That Make These Bars Special
Let’s talk about what goes into these incredible bars. Each ingredient serves a purpose beyond just flavor. Dates provide natural sweetness and bind the ingredients together, eliminating the need for refined sugars or artificial sweeteners. Their caramel-like flavor adds depth that perfectly complements the other components.
The nut or seed butter you choose becomes the soul of these bars. Whether you prefer creamy peanut butter, rich almond butter, or sunflower seed butter for nut-free options, each brings its unique character. This ingredient provides healthy fats and protein while creating that irresistible melt-in-your-mouth quality.
Quinoa might seem like an unusual addition, but it’s the secret weapon that elevates these bars from good to extraordinary. Cooked quinoa adds protein, fiber, and a delightful texture that sets these bars apart. It’s like adding little bursts of nutrition throughout each bite.
Step-by-Step Instructions for Perfect Protein Bars
Step 1: Prepare Your Pan
Begin by lining an 8-inch square baking pan with foil. This simple step makes cleanup effortless and allows you to easily lift the bars out once they’ve set. The foil creates a non-stick surface that ensures your bars come out perfectly intact.
Step 2: Create the Base Mixture
In your food processor, pulse the pitted dates until they’re finely chopped. This process releases their natural sugars and creates a sticky base that will hold everything together. Add your chosen nut butter, a pinch of fine sea salt, and vanilla extract. The salt might seem minimal, but it works magic by balancing the sweetness and enhancing all the flavors.
Process until everything blends into a smooth, fragrant mixture. Then add the rolled oats, cooled quinoa, and toasted walnuts. Pulse until the mixture comes together into a cohesive dough. The walnuts add crunch and healthy fats, while the oats provide fiber and substance.
Step 3: Add the Final Touch
Now for everyone’s favorite part – the chocolate chips! Add them to the mixture and pulse just once or twice to combine. You want to distribute them evenly without over-processing, so they maintain their shape and provide little bursts of chocolate goodness throughout the bars.
Step 4: Shape and Set
Transfer the mixture to your prepared pan. Using a large piece of wax paper or plastic wrap, press the mixture firmly and evenly into the pan. This technique prevents sticking and helps you achieve a smooth, professional-looking surface. The firm pressing ensures the bars hold together beautifully when cut.
Refrigerate for at least one hour to allow the bars to set properly. This chilling time is crucial – it allows the fats from the nut butter to solidify slightly and helps all the ingredients bond together. The wait is absolutely worth it when you taste the final result.
Customization Ideas for Your Protein Bars
One of the joys of this recipe is how easily you can make it your own. If walnuts aren’t your favorite, try pecans or almonds instead. For a tropical twist, add shredded coconut along with the chocolate chips. If you’re avoiding chocolate, dried cranberries or chopped apricots make wonderful alternatives.
For extra protein boost, consider adding a scoop of your favorite protein powder. Just remember to adjust the liquid ingredients slightly if needed. The possibilities are truly endless, allowing you to create bars that perfectly suit your taste preferences and nutritional needs.
Storage and Serving Suggestions
Once cut into bars, store them in an airtight container in the refrigerator. They’ll keep beautifully for up to two weeks, though I doubt they’ll last that long! These bars are perfect for meal prepping – make a batch on Sunday and have healthy snacks ready for the entire week.
I love enjoying these bars slightly chilled straight from the refrigerator. The cool temperature enhances their chewy texture and makes the chocolate chips satisfyingly firm. They’re perfect for breakfast on the run, a mid-afternoon pick-me-up, or even as a light dessert when you’re craving something sweet but nutritious.
Why These Beat Store-Bought Protein Bars
Having experimented with numerous commercial protein bars, I can confidently say these homemade versions surpass them in every way. You control the ingredients, avoiding preservatives, artificial sweeteners, and excessive sugars. The texture is consistently perfect – chewy without being gummy, substantial without being heavy.
Economically, making your own protein bars saves significant money compared to purchasing premium bars. More importantly, the satisfaction of creating something nourishing with your own hands adds an extra layer of enjoyment to every bite. These bars represent not just nutrition, but self-care and mindfulness in snack form.
Final Thoughts on No Bake Protein Bar Magic
Creating these no-bake protein bars has transformed how I approach healthy snacking. The process is therapeutic, the results are delicious, and the nutritional benefits are substantial. Whether you’re an athlete needing fuel, a busy professional seeking convenient nutrition, or someone simply wanting to eat cleaner, these bars deliver on all fronts.
The next time you find yourself reaching for an expensive, packaged protein bar, consider trying this recipe instead. You might just discover that the best protein bars aren’t found in stores – they’re made in your own kitchen with love, real ingredients, and the simple magic of no-bake preparation.
No Bake Protein Bars
Ingredients
Equipment
Method
- Line an 8-inch square baking pan with foil.
- In food processor, pulse the dates until finely chopped. Add nut butter, salt and vanilla; process until blended. Add the oats, cooled quinoa, and walnuts; pulse until mixture forms a dough. Add chocolate chips; pulse 1 or 2 times to just combine.
- Press mixture into prepared pan (use a large piece of wax paper or plastic wrap to smooth and spread mixture flat).
- Refrigerate for at least 1 hour. Using foil liner, lift mixture from pan and transfer to a cutting board. Peel off foil and cut into 12 bars.