The Ultimate Chili Recipe: A Crowd-Pleasing Comfort Classic
There’s nothing quite like the comforting aroma of chili simmering on the stove. The rich scent of ground beef browning, the earthy warmth of chili powder, and the savory blend of tomatoes and spices filling your kitchen—this is what home cooking dreams are made of. As someone who has perfected this recipe through countless gatherings and chilly evenings, I can confidently say this truly is the best chili recipe you’ll ever need.
What makes this chili recipe stand out from the rest? It’s the perfect balance of hearty meatiness, subtle heat, and comforting flavors that meld together beautifully during the slow simmer. Whether you’re feeding a hungry family on a weeknight or hosting a game day party, this chili always delivers satisfaction in every spoonful.
Why This Chili Recipe Stands Out
Many chili recipes claim to be the best, but this one has earned its reputation through consistent results and rave reviews. The secret lies in the thoughtful combination of ingredients and the careful layering of flavors. Starting with quality ground beef and building upon it with aromatic vegetables, carefully selected spices, and just the right amount of liquid creates a depth of flavor that’s hard to beat.
The addition of beer might surprise some home cooks, but it’s this unexpected ingredient that adds a subtle complexity to the chili. The maltiness of the beer complements the tomatoes and beef beautifully, creating a richer, more nuanced flavor profile than traditional chili recipes. It’s that little extra touch that elevates this chili from good to unforgettable.
Choosing Your Ingredients
Great chili starts with great ingredients. For the ground beef, I recommend using lean ground beef (85/15 or 90/10) to ensure your chili isn’t overly greasy. The leaner beef allows the other flavors to shine without being weighed down by excess fat. When browning the beef, take your time to develop a nice sear—this creates those delicious browned bits that add so much flavor to the final dish.
The vegetable trio of onion, jalapeño, and green bell pepper forms the aromatic foundation of this chili. Dice them uniformly so they cook evenly and distribute throughout the chili perfectly. Don’t skip seeding the jalapeño unless you want extra heat—the seeds contain most of the spiciness. The green bell pepper adds a subtle sweetness that balances the heat beautifully.
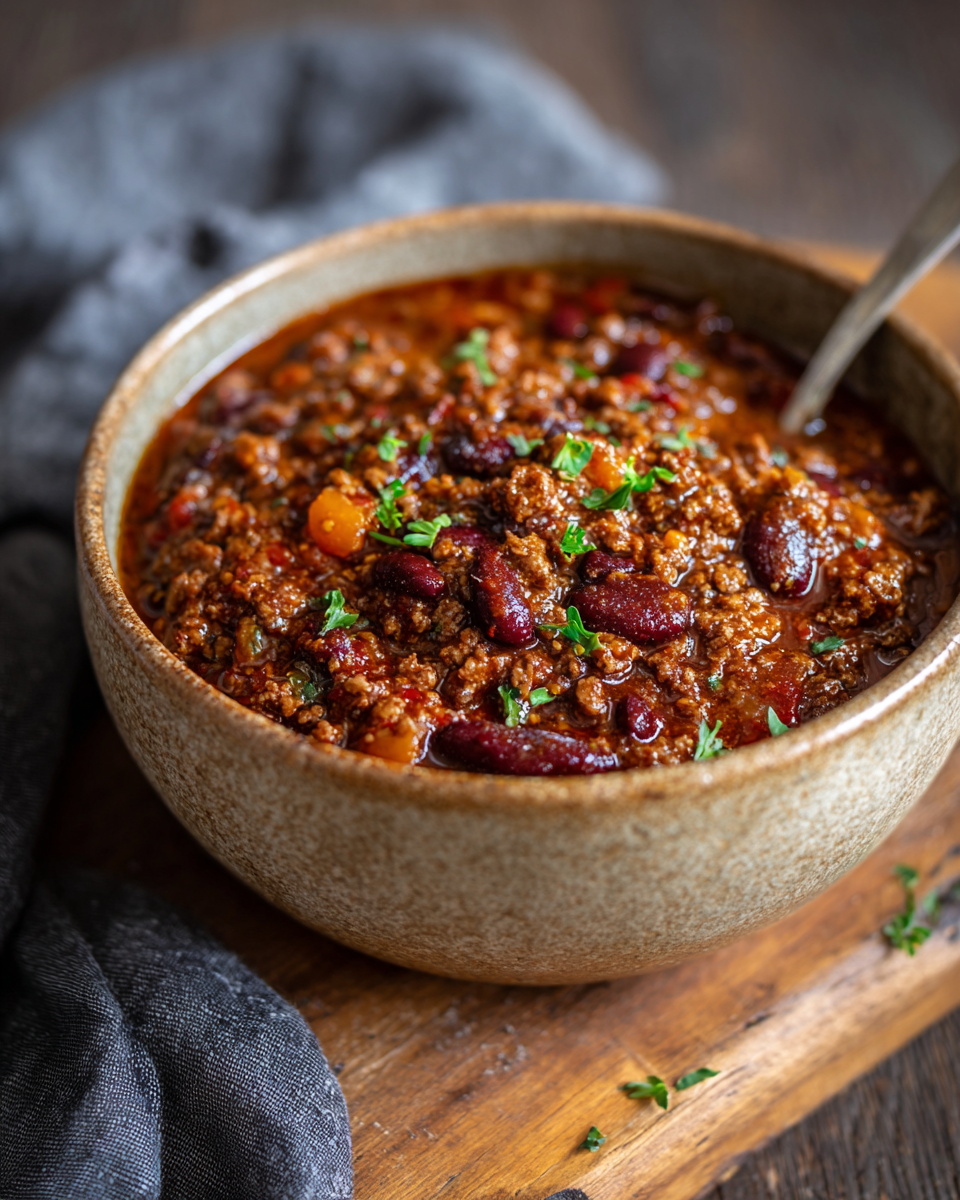
When it comes to beans, red kidney beans are my go-to choice for chili. They hold their shape well during cooking and have a firm texture that complements the ground beef perfectly. Be sure to drain and rinse them thoroughly to remove any excess sodium and the liquid they’re packed in.
The Spice Blend That Makes the Difference
Chili powder is, of course, the star of the show when it comes to seasoning. Using 2 ½ tablespoons might seem like a lot, but it’s what gives the chili its signature flavor and beautiful color. I like to divide the chili powder, adding some directly to the ground beef during browning and the rest later with the other ingredients. This technique ensures the spice flavor penetrates the meat deeply.
Cumin is the unsung hero of many chili recipes, and this one is no exception. Just one teaspoon might not seem like much, but cumin adds an earthy warmth that complements the chili powder perfectly. The combination creates that classic chili flavor we all know and love.
Don’t overlook the optional brown sugar—it’s there for a reason. A tablespoon of brown sugar might sound unusual in a savory dish, but it helps balance the acidity of the tomatoes and adds a subtle sweetness that rounds out the flavors beautifully. It’s one of those secret ingredients that makes people wonder what makes your chili taste so good.
Cooking Technique Matters
The cooking process for this chili is straightforward but important to follow for the best results. Starting with browning the ground beef with the aromatics is crucial. Take your time with this step—don’t rush the browning process. You want the beef to develop a nice crust and the onions to become translucent and sweet.
Draining the fat after browning is an essential step many home cooks skip. Removing the excess fat ensures your chili isn’t greasy and allows the other flavors to shine. Use a slotted spoon to remove the beef mixture from the pot, then pour off the fat before returning everything to the pot.
The simmering time is where the magic happens. Allowing the chili to simmer uncovered for 45-60 minutes gives the flavors time to meld together and the liquid to reduce to the perfect consistency. You’ll know it’s ready when it has thickened nicely and the flavors have deepened. Stir occasionally to prevent sticking, but otherwise, let it work its magic.
Perfecting Your Chili Consistency
Chili consistency is a personal preference, and this recipe allows for customization. If you prefer a thicker chili, let it simmer a bit longer. For a thinner chili, you can add a bit more beef broth or beer. The beauty of this recipe is its flexibility—you can adjust it to your liking without compromising the flavor.
During the last 15 minutes of cooking, taste and adjust the seasoning. This is your opportunity to add more salt, pepper, or even a bit more chili powder if you want extra heat. Remember that the flavors will continue to develop as it sits, so it’s better to be slightly under-seasoned than over-seasoned at this stage.
Topping Ideas to Elevate Your Chili
The perfect bowl of chili isn’t complete without the right toppings. Shredded cheddar cheese is a classic choice that melts beautifully into the hot chili. For a fresh contrast, chopped green onions add a mild onion flavor and vibrant color. If you’re feeling adventurous, fresh cilantro brings a bright, herbal note that cuts through the richness.
Other fantastic topping options include sour cream for cooling creaminess, diced avocado for buttery texture, or even tortilla chips for crunch. For those who love extra heat, sliced jalapeños or a drizzle of hot sauce can take your chili to the next level. The beauty of chili is that it’s a canvas for your personal preferences.
Serving Suggestions and Pairings
This chili is incredibly versatile when it comes to serving options. Of course, it’s perfect served in bowls with your favorite toppings, but don’t stop there. Serve it over baked potatoes for a hearty meal, or spoon it over hot dogs for classic chili dogs. It’s also fantastic served alongside cornbread for dipping.
For beverage pairings, the beer used in the chili makes it a natural match with a cold lager or ale. If you prefer non-alcoholic options, sweet iced tea or even a crisp apple cider complements the spicy, savory flavors beautifully. The acidity and sweetness help balance the richness of the chili.
Making It Your Own: Customization Ideas
While this recipe is fantastic as written, chili is meant to be customized. If you prefer different beans, feel free to substitute pinto beans or black beans. For a smokier flavor, add a teaspoon of smoked paprika. If you want more vegetable content, corn or diced carrots make excellent additions.
For those who love extra meatiness, consider adding some diced bacon with the ground beef or mixing in some ground pork. Vegetarian friends can substitute the ground beef with plant-based crumbles or additional beans. The recipe is wonderfully adaptable to different dietary needs and preferences.
Storage and Reheating Tips
One of the best things about chili is that it often tastes even better the next day. Store leftover chili in an airtight container in the refrigerator for up to 4 days. When reheating, do so gently over low heat, stirring occasionally. You may need to add a splash of broth or water if it has thickened too much.
This chili also freezes beautifully. Portion it into freezer-safe containers or bags and it will keep for up to 3 months. Thaw overnight in the refrigerator before reheating. Having individual portions frozen makes for quick and easy meals on busy days.
The Final Result: Comfort in a Bowl
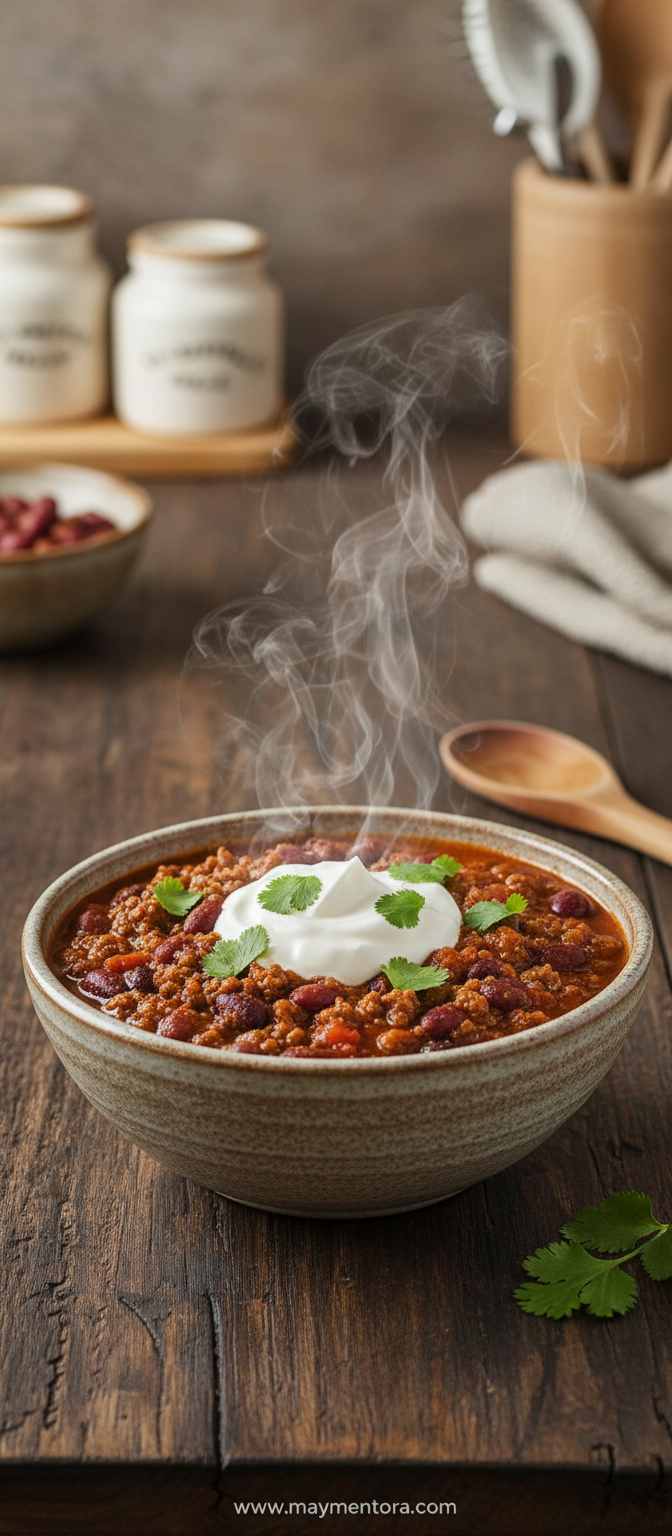
When you finally ladle this chili into bowls and top it with your favorite garnishes, you’ll understand why it’s earned the title of “the best.” The rich, meaty base, the perfect blend of spices, the subtle heat from the jalapeño, and the comforting presence of beans and tomatoes all come together to create a dish that feels like a warm hug.
Whether you’re making this for a casual family dinner, a festive gathering, or just because you need some comfort food, this chili recipe will not disappoint. It’s been tested, tweaked, and perfected to deliver consistent, delicious results every time. So grab your pot, gather your ingredients, and get ready to make what might just become your new favorite chili recipe.
The Best Chili Recipe
Ingredients
Equipment
Method
- Combine ground beef and 1 ½ tablespoons chili powder
- In a large pot, brown ground beef, onion, jalapeño, and garlic. Drain any fat
- Add in remaining ingredients and bring to a boil. Reduce heat and simmer uncovered 45-60 minutes or until chili has reached desired thickness
- Top with cheddar cheese, green onions, cilantro or other favorite toppings